I’ve always had a thing for brick walls. They have so much texture, depth, personality. Brick makes everything better.
So when I thought of making a dollhouse for my daughter, my mind immediately said “brick”! I’ve watched a lot of tutorials on how to make scale bricks, from making forms out of foam core to cutting a slab of clay in the right sized rectangles. You can also laser-cut your brick pattern into MDF and just paint the bricks and grout lines. I even saw a few people recommend painting foam bricks or gluing brick-sized cutouts from egg cartons to your wall.
But I’m a sucker for authenticity, and so decided to go perhaps a little too far in the direction of laboriously handmade.
The Process
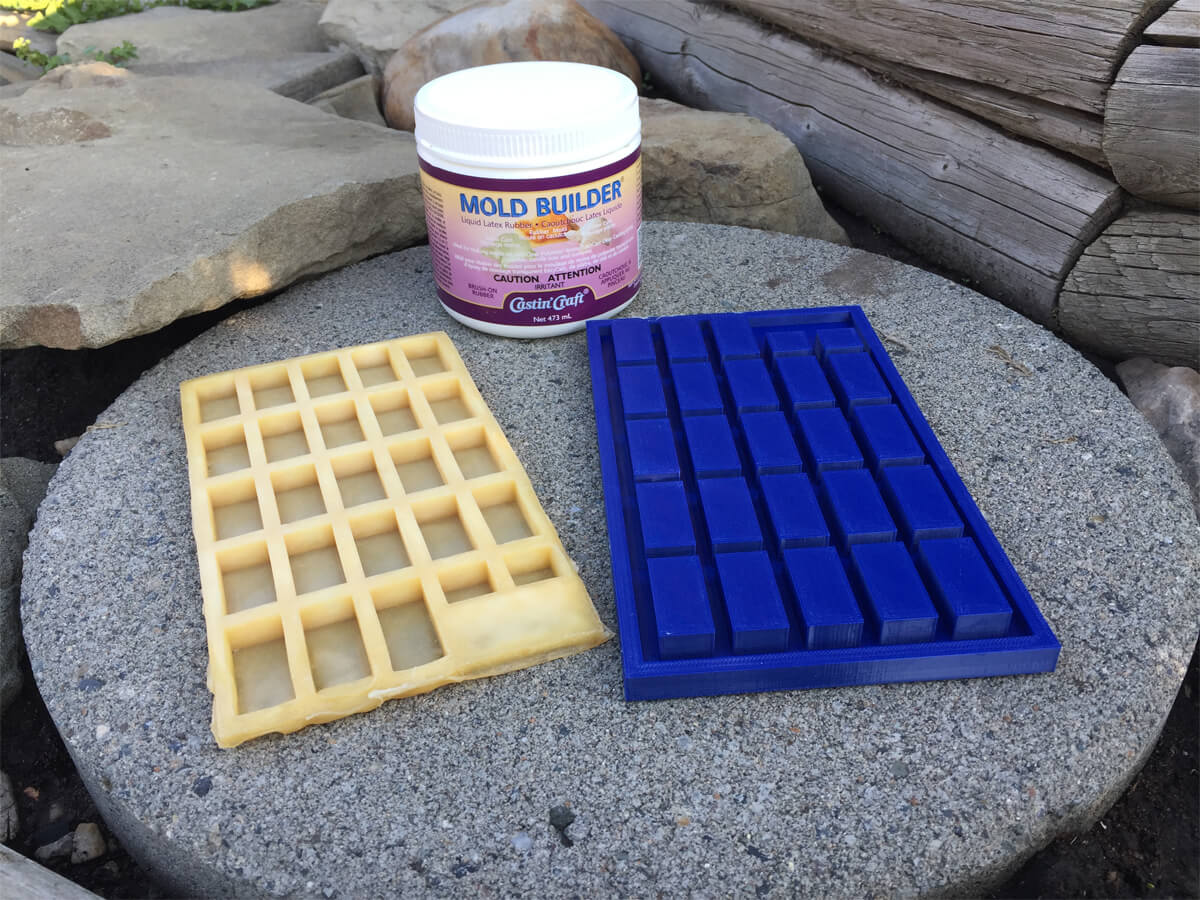
I dusted off my barely-there CAD designing skills I picked up last year to start things off. I fiddled with the 3D modeling to make an inverse of the brick mold. And since I’m fortunate enough to have a husband who likes to 3D print things, he fired up our MakerBot and printed up a lovely hard plastic form for me to work with.
Looking to print the brick mold yourself? Download the CAD file (STL format)
I chose a paint on rubber (Mold Builder by Castin Craft) to make the mold with, which indicated carefully painting 11 coats of rubber onto what you want to make a mold of. The only problem was that each coat needed at least 6 hours to dry, and preferably 12. So if you add to that the fact that I just did a coat whenever I had time, it took me several weeks a month to get the mold finished. Despite the long time lapse, the rubber captured detail better than expected and it’s lasted well through regular use.
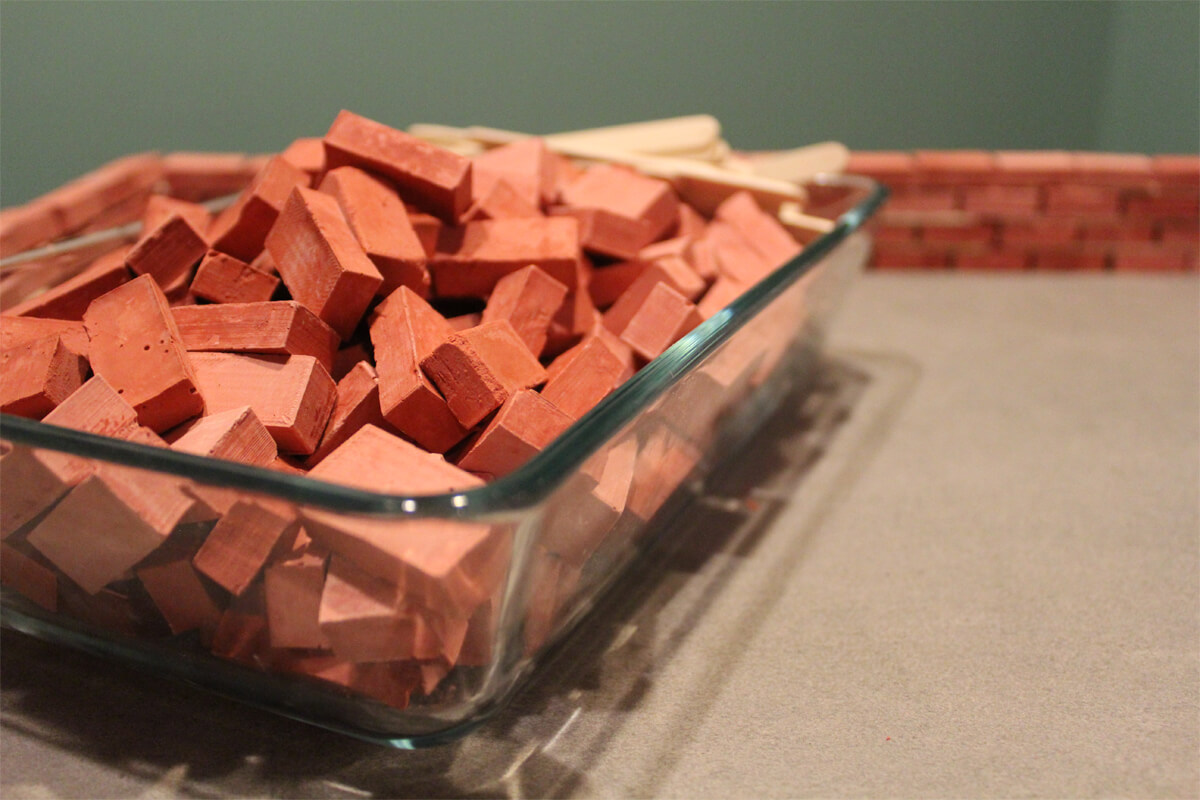
As I was making the mold I did some research into what types of material to use to make the bricks. I ended up deciding on plaster of Paris as it sets quickly (under an hour), is easy to clean up, and pretty cheap. I also have fond memories of making Richard Scarry molds with it as a child. My backup option was to be cement since Plaster of Paris isn’t waterproof (it might melt in the rain), but in this case, it wasn’t a big concern.
One of the things you have to be careful of when doing any sort of casting is the dreaded air bubble. If you don’t get those suckers out before your medium sets you have holes in your beautiful cast. I ended up going with the tried-and-true (as well as free) method of just tapping the mold until air bubbles stopped coming to the surface. But if you’re going to be making a lot of bricks you might consider a cheap vacuum degassing rig – basically a shatterproof vacuum jar and a vacuum pump to force the air bubbles to rise to the surface.
I ended up spending a lovely evening playing around with iMovie to share my method for brick making. Wanna see?
My Brick Recipe
2019 update: I realized that I never posted the recipe for bricks! You’ll need:
- 1/4 cup water
- 1/4 tsp cement color
- 3/4 cup plaster of Paris
Mix the water and coloring together in a disposable cup. Add the Plaster of Paris and mix well. Spray the inside of your mold lightly with Windex to reduce surface tension and prevent air bubbles. Pour the Plaster of Paris mix into the mold. Let sit for 45 minutes to 1 hour, then remove from the mold.
Bricks can be sanded or weathered if needed – since the coloring is part of the brick (not painted on top) it’ll look authentic!
Materials & Costs
If you want to tackle a project like this, you’ll need a few materials. I bought my first box of plaster of Paris at Michael’s but heard a rumor that you can find it in the paint section at hardware stores. Turns out it was half the price!
I also used popsicle sticks and plastic cups so I could dispose of them. It ends up being more garbage in the landfill than I’d like, but I heard that plaster of Paris will clog up your drains if you rinse the extras down the sink. Yikes.
- Castin’ Craft Mold Builder – $17.99 (Michael’s)
- Dap Plaster of Paris – $5.99 for 4 lbs (Lowe’s)
- Quickrete Liquid Cement Color – $14.99 (Lowe’s)
- Plastic cups for mixing – $1 (dollar store)
- Popsicle sticks for stirring – $1 (dollar store)
The materials above let me make around 325 bricks before I had to stop in at the store for more plaster of Paris. The cement coloring was only about 1/4 used, so I’m guessing it would be good for around 1300 bricks.
If you’re looking to make your own scale bricks, I found the chart on Wikipedia very helpful. For the 1:6 scale bricks I made here, I just divided all the dimensions by 6:
| Standard | Imperial | Metric |
|---|---|---|
| Australia | 9 × 4⅓ × 3 in | 230 × 110 × 76 mm |
| Canada | 7⅝ × 3⅝ × 2¼ in | 194 × 92 × 57 mm |
| Denmark | 9 × 4¼ × 2¼ in | 228 × 108 × 54 mm |
| Germany | 9 × 4¼ × 2¾ in | 240 × 115 × 71 mm |
| India | 9 × 4¼ × 2¾ in | 228 × 107 × 69 mm |
| Romania | 9 × 4¼ × 2½ in | 240 × 115 × 63 mm |
| Russia | 10 × 4¾ × 2½ in | 250 × 120 × 65 mm |
| South Africa | 8¾ × 4 × 3 in | 222 × 106 × 73 mm |
| Sweden | 10 × 4¾ × 2½ in | 250 × 120 × 62 mm |
| United Kingdom | 8½ × 4 × 2½ in | 215 × 102.5 × 65 mm |
| United States | 7⅝ × 3⅝ × 2¼ in | 194 × 92 × 57 mm |
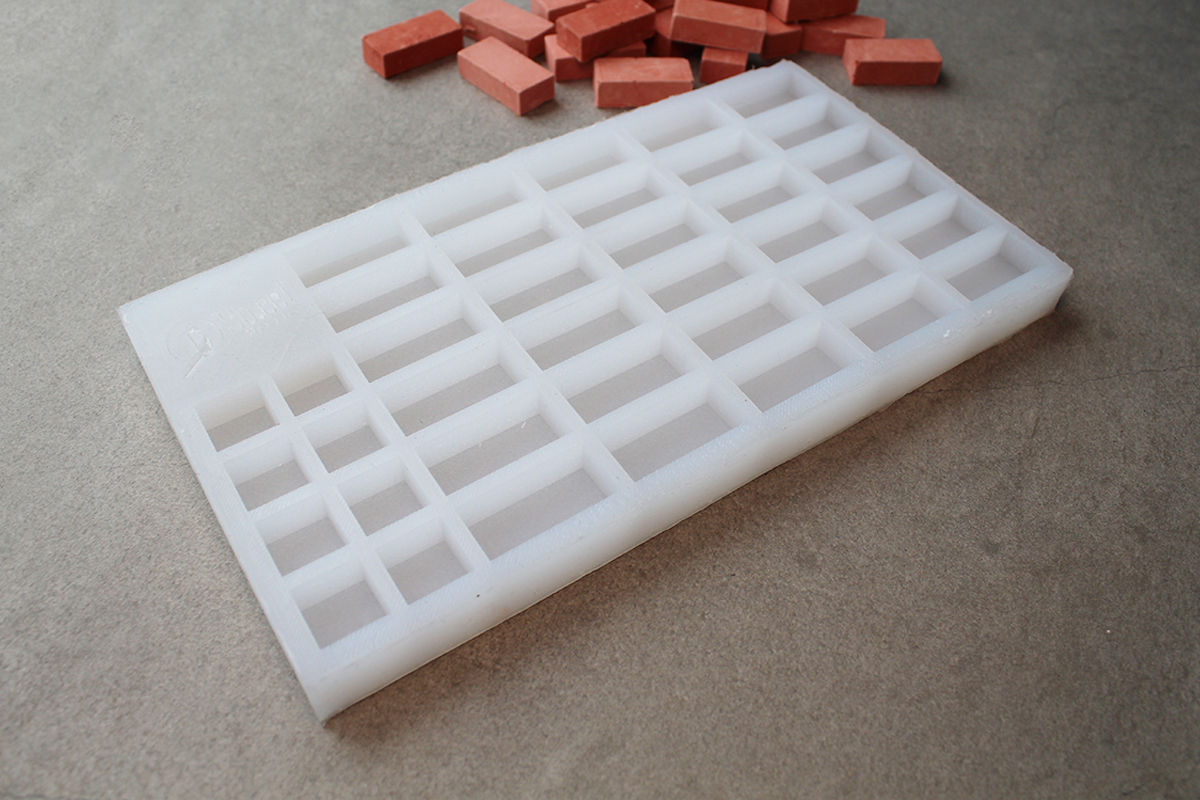
2021 update:
I’ve switched to making my molds using pourable silicone: Mold Star 20T from Smooth-On. It’s more durable, looks nicer, and is faster to make molds with. Just spray your 3D-printed form with Universal Mold Release, mix your two parts of silicone, pour, and wait an hour. Et voila, a beautiful new brick mold.
Have questions?
Just comment below and I’ll get back to you. Happy brick making!
31 replies on “How to make 1:6 scale bricks”
Can you give me the link or file so i can 3d print it and make the mold?
Thanks for writing in, Martin! I’ve updated the tutorial to include the STL file. Happy brick making!
I’m looking to make a 3d print Mold for Mini cement cinder blocks, could you help? I currently have a mold already but it’s only for 4 bricks. I would like to mass produce but would like molds that hold around 12, 16, or 20 bricks each mold, or something like that. Thank you.
Good to hear from you, Manuel! I’m the wrong person to ask about making you a mold since I’m a newbie to CAD. I learned enough to get the job done by going through the Onshape video tutorials.
If you’re interested in learning enough CAD to make yourself a cinder block mold, I’d check out the tutorials at https://www.onshape.com/videos/topic/intro-to-cad
Thank you after searching for mold I came across this mold for a 1/6 brick and then I saw your video. Thank you not only is it the perfect sized brick you have (and shown) it’s easy and what I wanted. You have all the steps plus all the helpful hints and hacks to make a set of perfectly sized bricks and made the steps so easy. I plan to make 1200 bricks so all I have to change is adding 4 times the plaster to make all my bricks. Thank you for making such s great video. I’m making a rather large diorama 1/6 with 12″ GI.Joes. It’s 14′ running feet fir my French tien and battle scene.
Hi Jeffrey – sorry it took me so long to respond! I’m so pleased that this might be a good solution for your bricks. I did a lot of searching online as well to try and find the best way to make them before deciding to try a mould. Since this tutorial I’ve also made a few moulds with Smooth On Liquid Rubber (PMC 121/30) and found that it’s faster than the paint-on mould shown in this tutorial, because it’s a pour-and-set rubber. Please do send a photo of your diorama when you get it done – I’d love to see!
Will do. Ordered the mold kit and a bag of ready made 1:6 bricks to cast the. Molds Great tips and plaster tint. Will use it for sure. Ivd put it off for weeks. But am ready to build the first building a 2-story church with choir loft and stairs and 2 12″ stain glass windows. I’ll experiment with celophanes plexiglass and see through material with a gel water color to get a rich color. Ready to get going! Thank you
I would love to see what you used these awesome bricks for! Do you have any posts of the final project for which you used them? I couldn’t find it.
Thank you for sharing!
Mar, I feel so honored that you went looking for my project! I would have been blown away if you found it online because my future self would have had to post it. The plan for these bricks was to make a 1:6 scale living room with brick walls, but this project has been on the backburner for quite a while now. I made about 500 bricks with this method and then did the calculations and realized I needed to make another 500 or so. So discouraging! But I’ll be sure to flip you a note when I have something to show. Thanks for checking in!
Hi, they are enough strong to make a wall for a mini house? Thanks 🙂
That’s what I plan on using them for! They function pretty much the same as real bricks.
I saw your post on pinterest about three weeks ago about your brick mold, Now three weeks later I decided to purchase one, To my dismay I found it is sold out. Most frustraiting. Any chance you will be making any more in the future?
Gary, you’re in luck! I’m currently out of mold material but have a new order in which should arrive in the next week or two. Then I’ll be posting more to my shop for purchase. Would you like me to send you a quick note when they’re up in the shop?
What material did you use to make the white flexible mold (under the 2019 update that you currently sell in your etsy store) and where do you get it?
I’ve been making my latest flexible molds with pourable silicone from https://www.smooth-on.com/
Once the bricks are out of the mold, do I need to wait any longer before gluing them onto my project? (Of course, I would use polyurethane to seal them to make the final product.)
I’ve found that they do get more solid/dry over the next 48 hours, so I’d recommend waiting until they’re really dry to ensure they’re cured. After that, a sealant is recommended, and then you’re ready to glue away!
Is it in any way possible to ship this to the US?
If you’re asking for a mold you can purchase, I’ve listed a few on my Etsy shop in case you aren’t that keen on making your own 😉 https://www.etsy.com/ca/shop/sweetmgpi
Yeah, I was talking about the mold. Idk if there’s any way to ship the mold to the US because it says “this item doesn’t ship to the United States”, but I was just checking to see if you knew a way to ship it here.
Thanks so much for pointing this out – I checked my shipping profiles and the US one wasn’t working. I’ve gone in and updated it now – let me know if that works!
It works! Yay! Thank you!
Hello. I to have to make a vary large amount of bricks. I bought my flexible molds off the internet. 9 of them that produce 35 full size bricks plus half sizes as well. But what l was wondering. After l let the bricks sit for 48 hours. I was told to place the bricks onto a cookie sheet and place the bricks into a 220 oven for 2 hours. Would that help the bricks to get hard faster?
I’m not sure – I haven’t tried it before. It depends a lot on the material you’re pouring and how it cures best. Google may be your friend here 🙂
What do you use to glue your bricks together? Thanks!
I’ve been trying a few different ways to glue them together – cement, a fine sanded grout, hot glue, and white (Elmer’s) glue. I’d say start with what you have at home and test some different materials to find your favorite. Happy making!
See this version of bricks
Guide
https://youtu.be/iQa_d61fs_8
Hi I did your recipe and I mix everything together but my mixture is completely white? It seems that my quikrete cement color just dissolves. Am I mixing to much?
My Quikcrete cement color didn’t dissolve, even after a lot of mixing. Maybe try another brand of Plaster of Paris?
Please help! So I have created these bricks using quickcrete and coloring powder and they come out great however I have YeT to find a material that allows me to make the bricks stick together. I tried the same quickcrete mix and then played with the ratios of water/mix and they didn’t work, I’ve used every type of glue with no success, and I recently tried hydraulic (waterproof) cement following recommendation from hardware store but that likewise failed. Can I ask what you use?
I ran into similar challenges when creating my bricks. The best advice I header of was to seal the bricks with a tile sealant or white glue so the adhesive isn’t absorbed into the plaster of paris.