You know what? The world doesn’t need another “how to make a Nimbus 2000” tutorial. There are just so many great ones out there already! So instead of adding to the pile of already great video tutorials, I wanted to share something none of them had: a template for cutting out your broom handle.
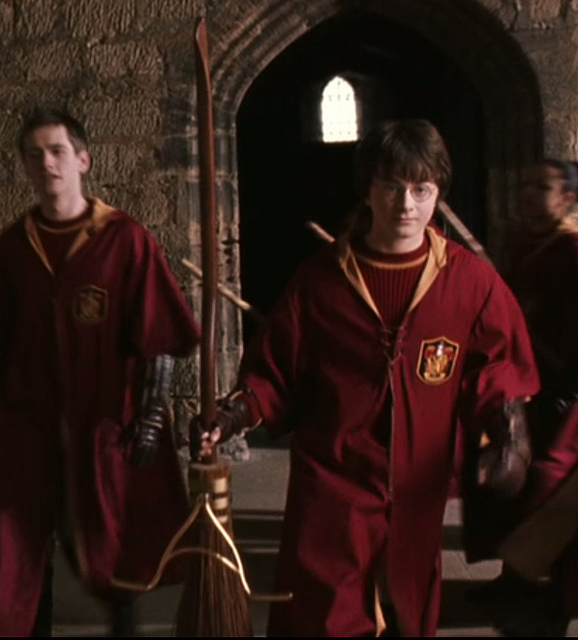
My research found that most people scale up a photo of a licensed broom by Cinereplicas and print it out to get the right shape for the handle. But, perfectionist that I am, the handle shape wasn’t close enough to that of the movie. So I stitched a bunch of screenshots of the broom in Diagon Alley together to get my pattern as close to the real one as possible.
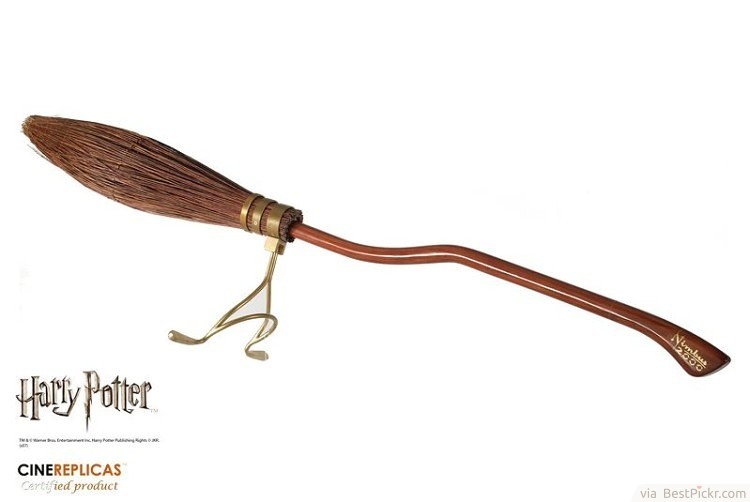

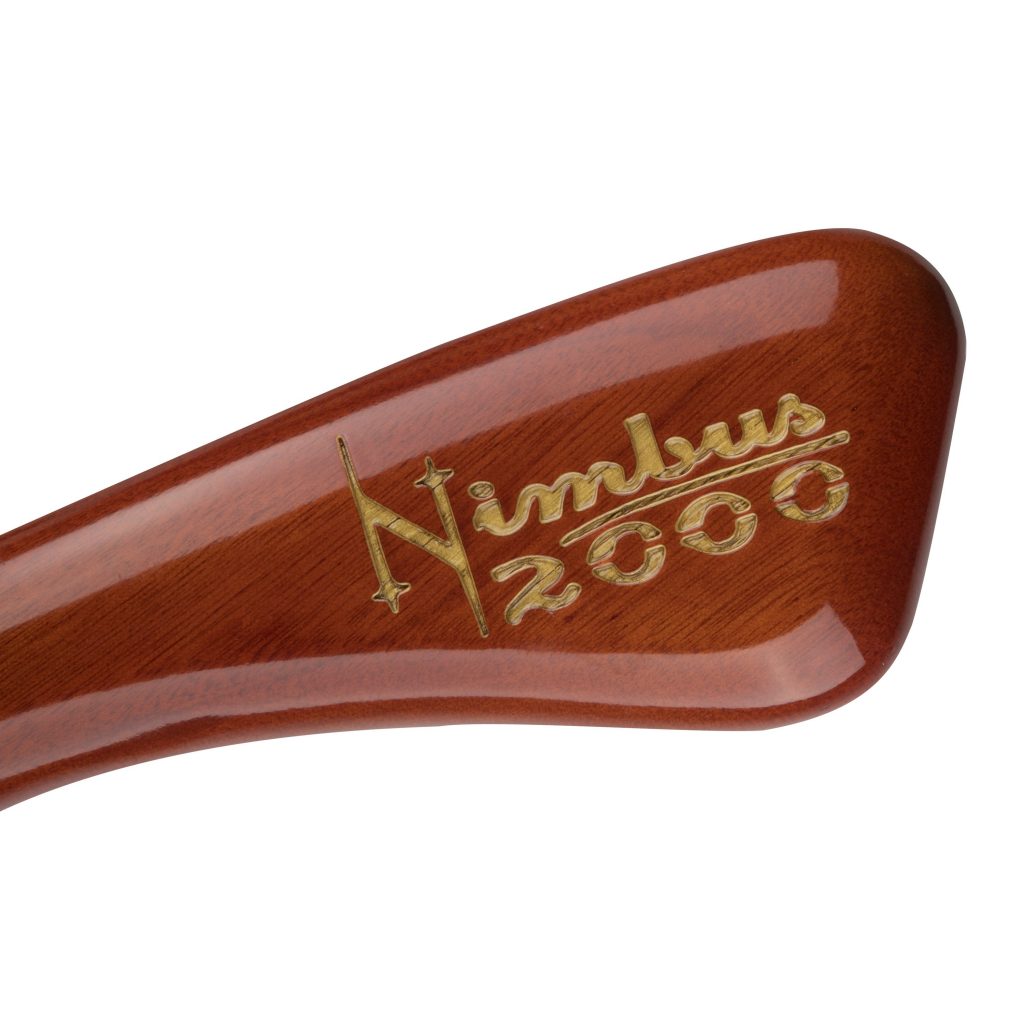
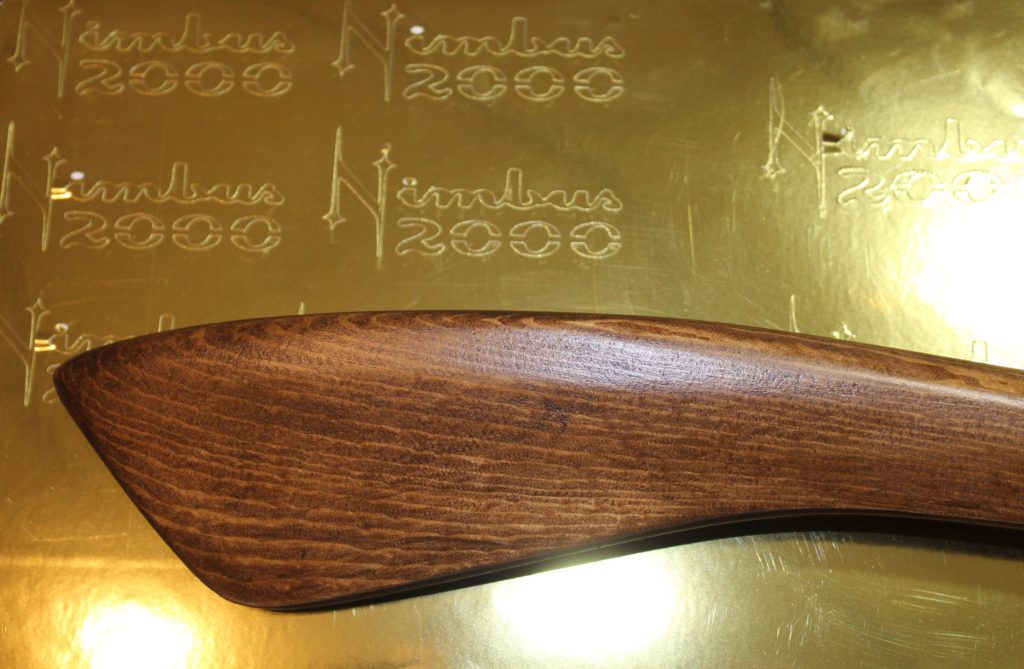
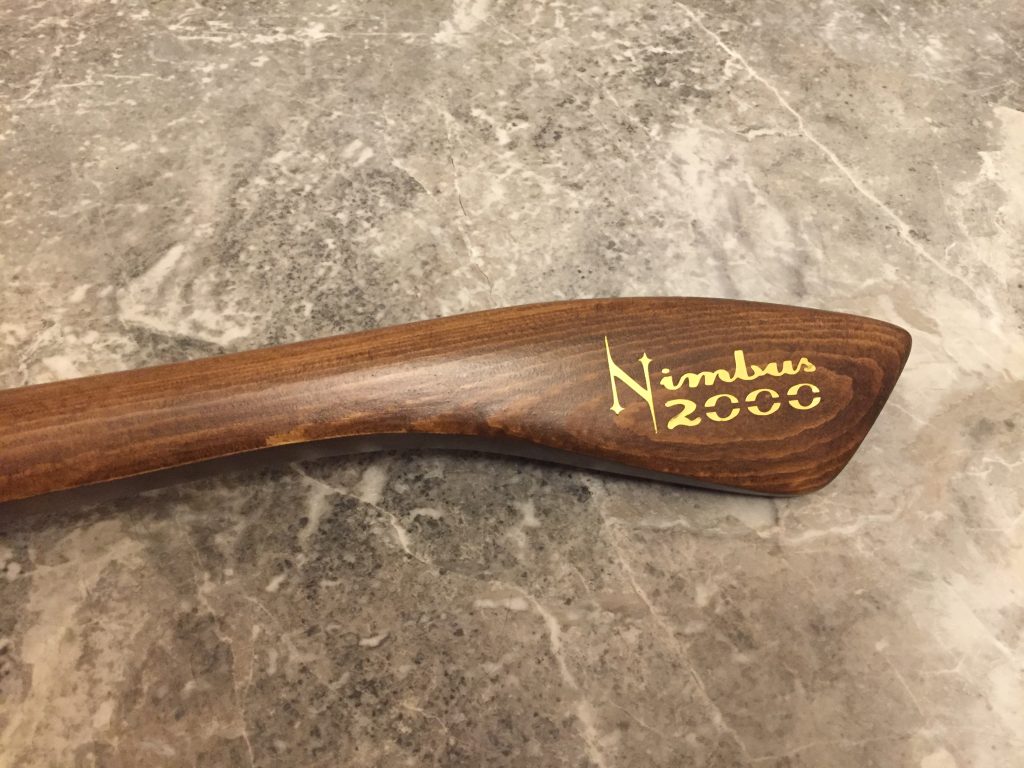
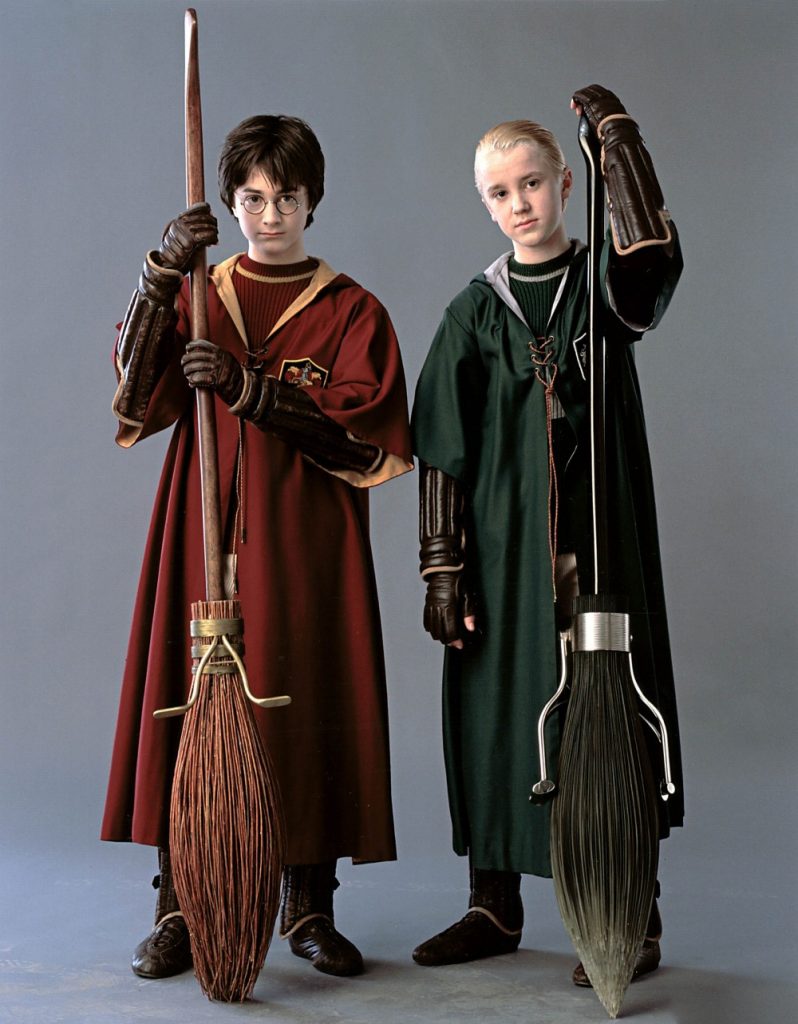
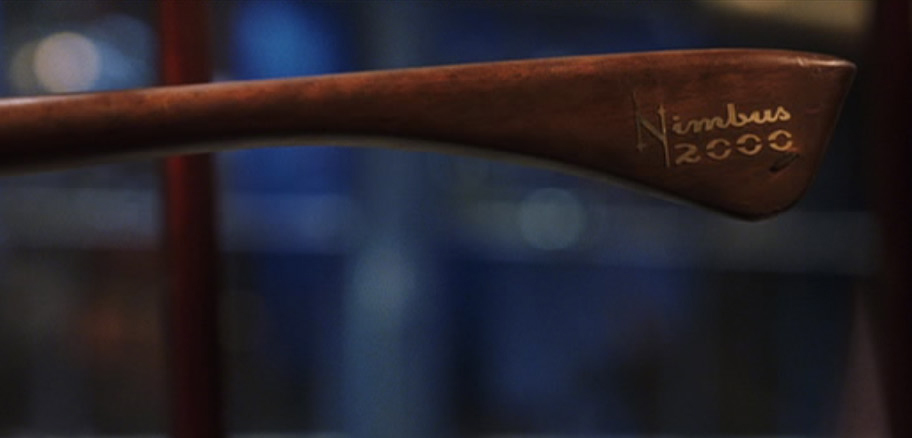
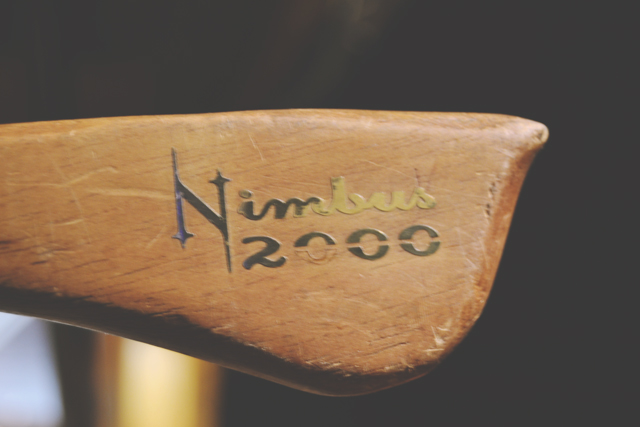
The place where the Cinereplica differs the most from the movie broom is at the head where the gold Nimbus 2000 logo is placed. Not only is the end of the broom a different shape, but the logo is angled differently on the Cinereplica than the original and has an added line between the word ‘Nimbus’ and ‘2000’.

When in doubt, go to the library
If you’re looking for a fabulous step-by-step photo tutorial of broom making, in minute detail, make sure you check out Justinas’ post on RPF or his Flickr album. It’s bloody brilliant. Another worthy mention: Chiok’s Instructable post on making his Nimbus.
This video has my favorite intro to date:
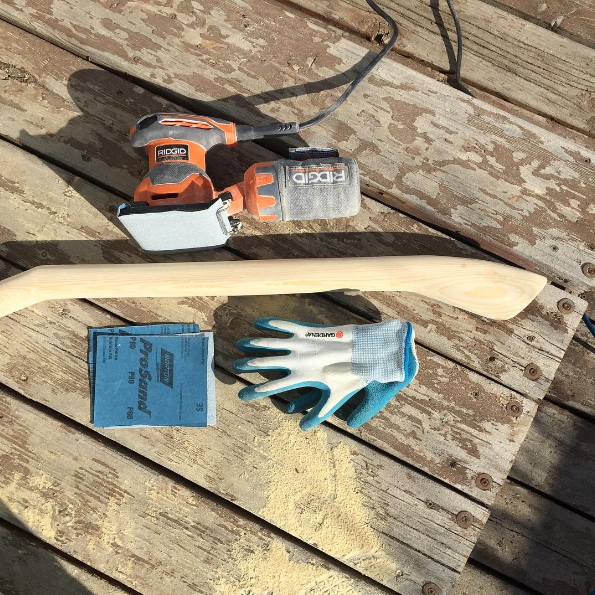
Making the Handle
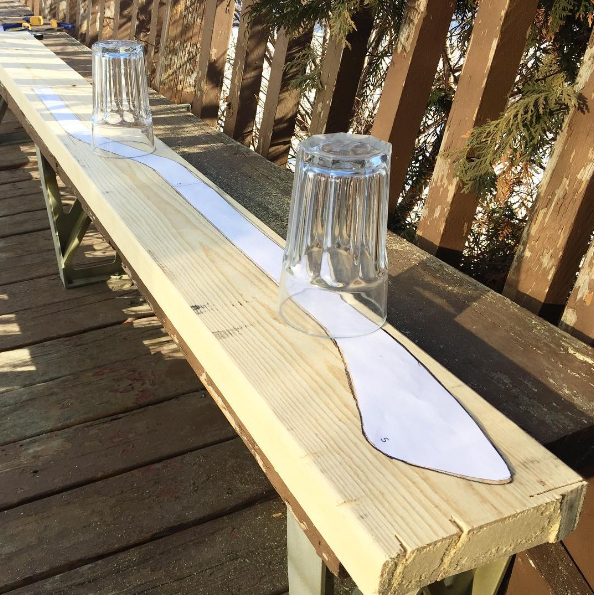
I made my broom by cutting out my pattern and tracing it on to a cheap 2’x10′ I picked up at Home Depot for $8. I cut it out with a jigsaw, then spent several hours sanding it to get as close as possible in shape to my reference photos.
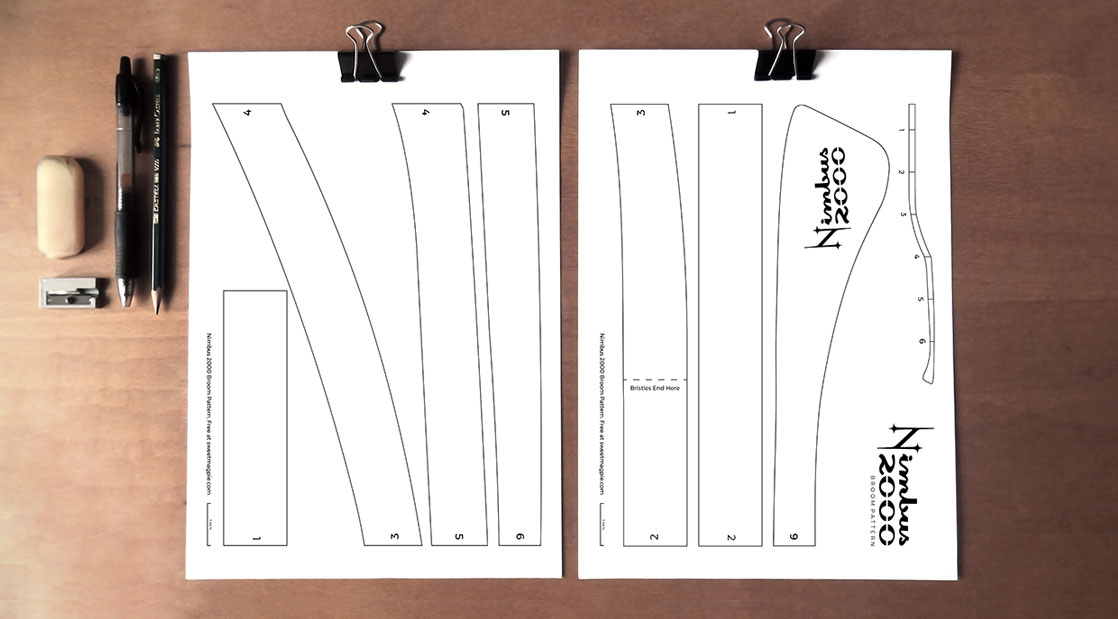
Below is a free copy of the template I used to cut out my broom handle. I’ve also added a few extra pages with source photos to help your broom-making ways.
Download the Nimbus 2000 Handle Pattern (free)
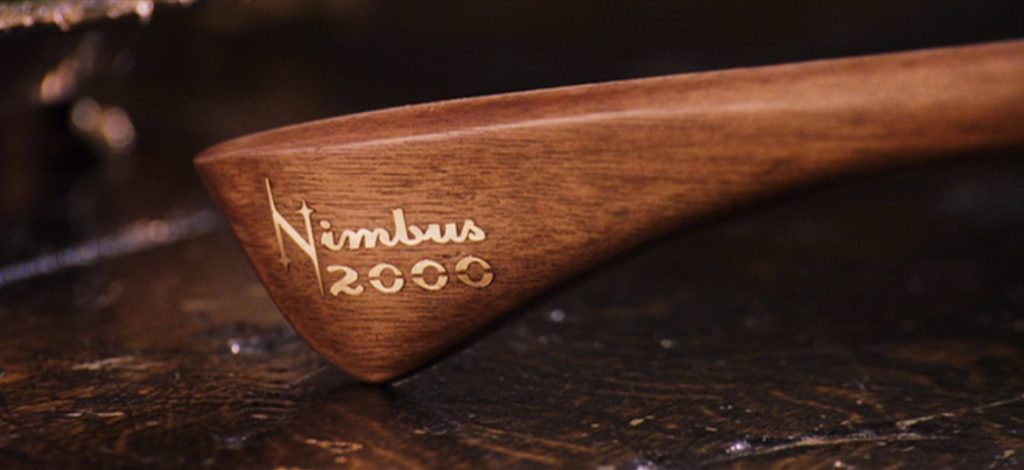
After that was staining, sticking on a Nimbus 2000 decal, and sealing it with 2 coats of Polycrylic in Satin. I’d recommend putting the sealant on over the decal to make sure it doesn’t peel off.
Working Those Bristles
Next, I bought four packages of long branches from the craft store for the bristles. I thought they looked just right, but after I brought them home and tried shaping them I realized they were thick and unpliable.
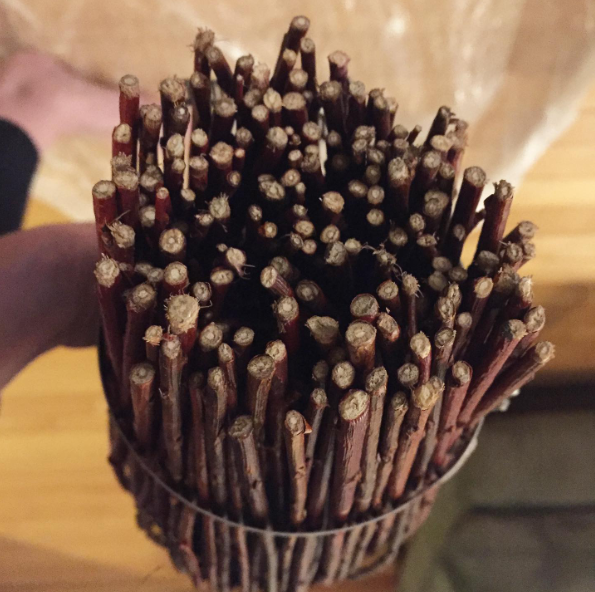
I had a dementor of a time trying to get them into the right shape. My first attempt was a total bust – the branches just stuck out at the end and wouldn’t stay together. I tried tying them with twine (it kept slipping off), hot gluing them, nothing seemed to work. I also made the mistake of cutting some of the pieces shorter thinking this would help the narrowing at the tail, but in reality, it just made random branches stick out in odd places. Should we call that rustic charm?
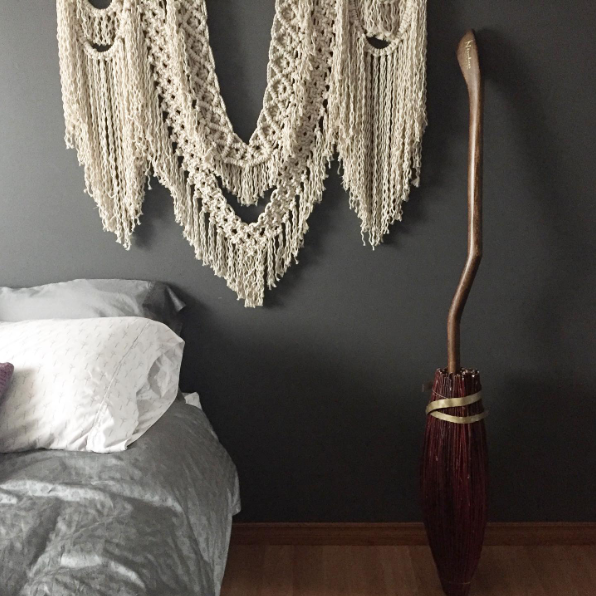
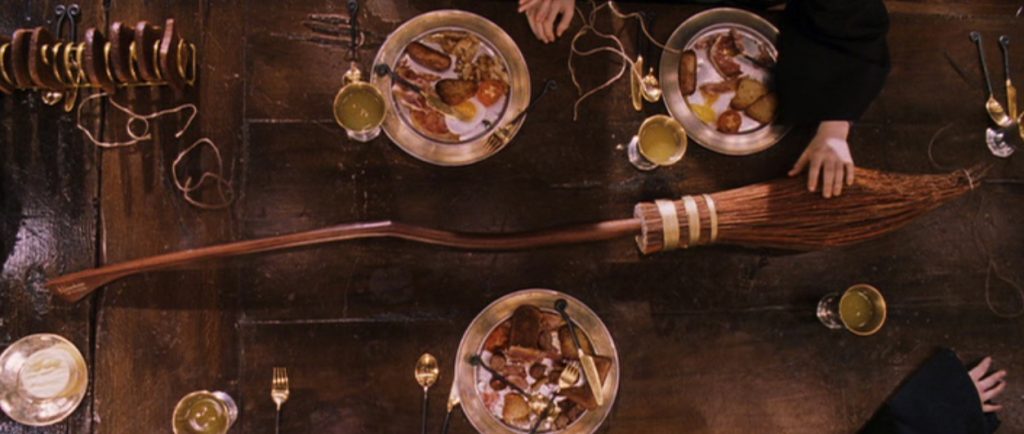
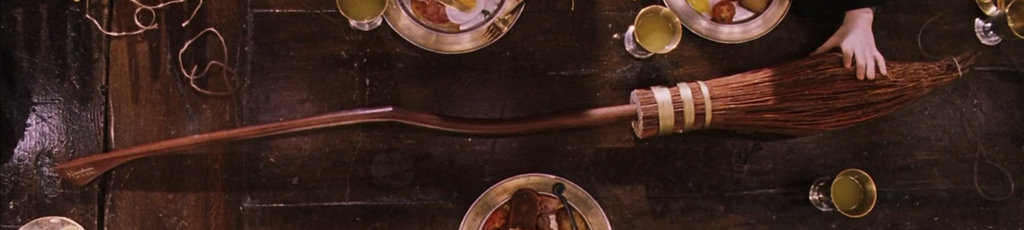
As you can see in the photo below, the handle shape is just spiffing. And after a day at the entertainment expo those gold bands are an eyesore. I blame the nargles.
At this point, I did some more research and ended up taking the broom tail apart. I soaked my branches for several hours and then wrapped them tightly in twine tied them tightly to dry for several days. This made them somewhat more pliable but still not flash ideal.
If you haven’t chosen bristles yet, I would highly recommend either thinner or greener branches, or dying broom straw to the right color. And maybe some industrial-strength glue. Or a fixing charm, yeah?
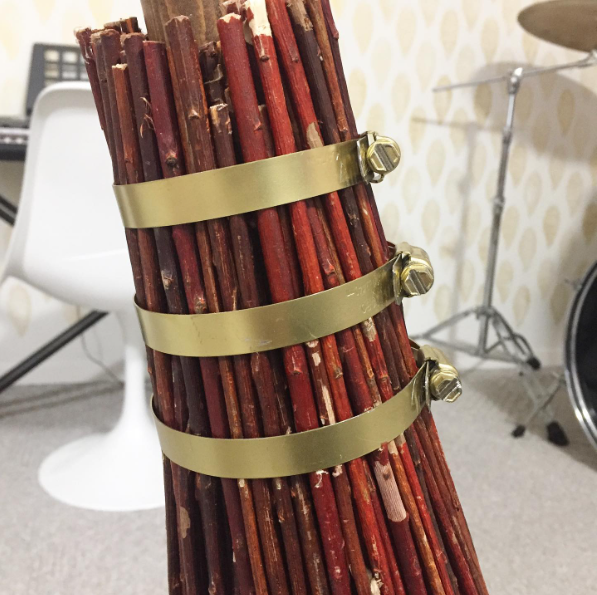
I’ve also found that these $3 metal gear clamps work ever so much better to hold the top together than twine covered by plastic bands. Add in some gold spray paint (I highly recommend Design Master’s 231 Gold Medal for a true gold) and you’re ready to take on Slytherin for the house cup!
The Portrait Wall
No maker blog is complete without an exhaustive sharing of source photos, right? Right. Especially when the shape that makes this handle so unique involves hours and hours of power sanding. Having clear photos helped me so much since I could see all the angles and what each should look like.


PS – Got a few extra minutes? Check out this instructable on how to make your own moving portrait. The writeup will make your day.
21 replies on “Making the Nimbus 2000”
Hello,
I like your page. But I find it a shame not to be able to download your pattern from the nimbus 2000.
I wanted to download it to create the broom for my son’s birthday.
good to you.
sandra
Hi Sandra, glad to hear you like it! Here’s the direct link to the pattern template: https://boulianne.net/maker/wp-content/uploads/2020/01/Nimbus-2000-Broom-Handle-Pattern-Free-Download.pdf
Hello,
thank you so much. I will be able to get down to work.
I hope to achieve the same result, because he is a big fan of harry potter.
Thanks for your sharing. I will also start the quidditch outfit so that on his birthday he will have some nice surprises.
Wow, you’re an ambitious parent! I’m sure your son will love all the work and care you’re putting into his Quidditch costume and broom. I’d love to hear how it turns out!
Hi thanks for this post this is awesome!!!! I may have missed it but what size paper do you print these out on?
Thanks, David! I designed it to print out on regular letter paper – 8.5 by 11 inches, so it works on standard home printers. Enjoy!
Thanks for the reply! I forgot to ask but all of the other replicas are an inch in diameter. Did you cut a half inch off from the 2×10 board. I thought it would be easier just to leave it the 1.5″
I didn’t thin down the board at all – often when a board says 2×10 it’s actually thinner when you measure it. Plus it gave me more space to sand off with my power sander, to make that perfectly round shape. Happy broom making!
Hello, I will take some pictures during the work. So you can see the progress of the work.
I’d love to see how it’s going! Thank you so much 🙂
Perfect thanks! The reason I asked is that in other videos they took a half inch off for whatever reason. They did it on a table saw after it was cut out, which I thought looked dangerous. I’m glad you didn’t.
hello, i just needed a little advice. Do you think if I use the shape of a rugby ball for the final part of the broom it might be fine? How did you proceed if it is not indiscreet. Thank you in advance.
A rugby ball could definitely work. I used styrofoam and shaped it into a good shape and glued it to the broom handle, then covered that with sticks. Here’s a video showing something that might work for you: https://www.youtube.com/watch?v=DzwboyHpZ2E
Great informative article!
One question I have is did you use a form of any type to shape the branches? In the videos on YouTube they use shaped foam/polystyrene as a base for willow.
Many thanks, James
Thank you, James! I did use polystyrene as a base for the willow. It took several revisions to get it to work decently well, and was a bit of a frustration. I originally made a very shaped polystyrene base, but found that there were two challenges: the branches I chose were too thick to shape enough to match the foam, and the polystyrene made the bottom of the broom comically large. I ripped it all out and halved the foam, painted it brown, and then re-shaped the branches around it. It turned out decently well, so that might be a good way to try. Best of luck with your broom creation!
I apologise, just seen you’re reply to a previous post about shaping the broom head! 😀
I really love this article. It was super informative and helpful. I would just make one tweak. You state in the area under the see the the video by “apprentice marks” that Jon picked the broom bristles by hand from his bushes, but that’s not true. If you go to the comments of that video, he clearly states multiple times (in replies to others questions about it) that he got them from his local craft store, Michael’s. I think you should change that if possible because it’s inaccurate, but aside from that, everything else is amazing and really well written. Love it!
Thanks for catching that, Lily! I’ve removed the note about picking the bristles by hand – that must have been another video I was watching at the time. 🙂
Love the template. I’m going to attempt this for my son for Christmas in 18 days!!!! Do you have a photo of your finished broom? I didn’t see you mention the stand/foot pegs; or did I miss it somewhere?
** Sorry, just thought of another question. How long do the broom bristles have to be? From that cut top to the tip is how long about?
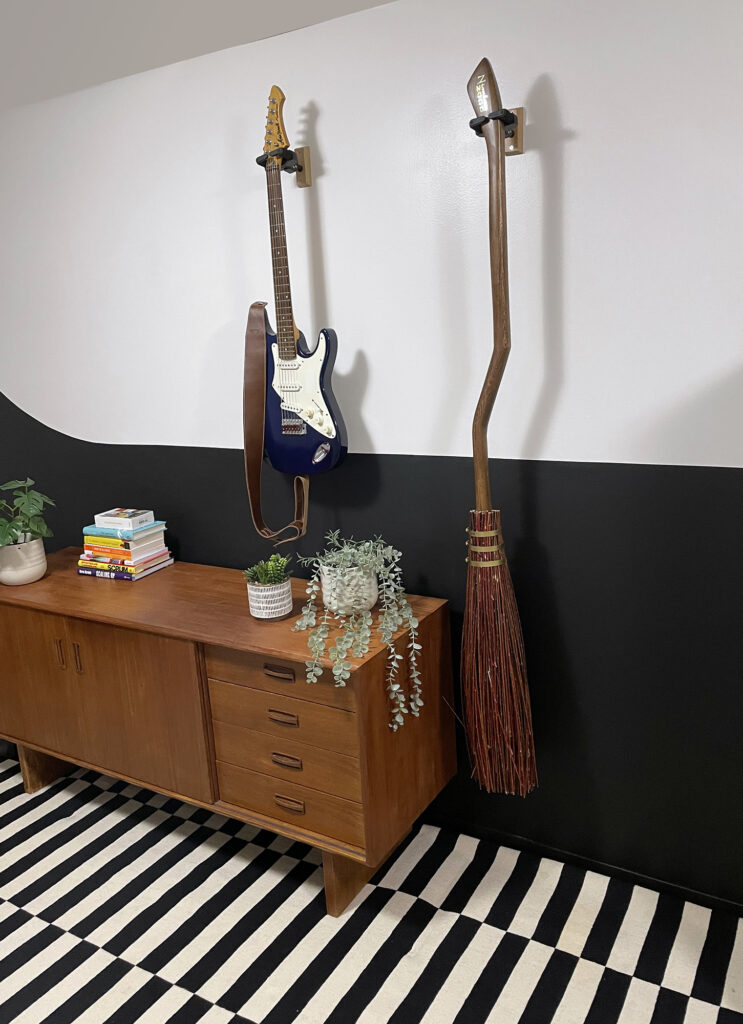
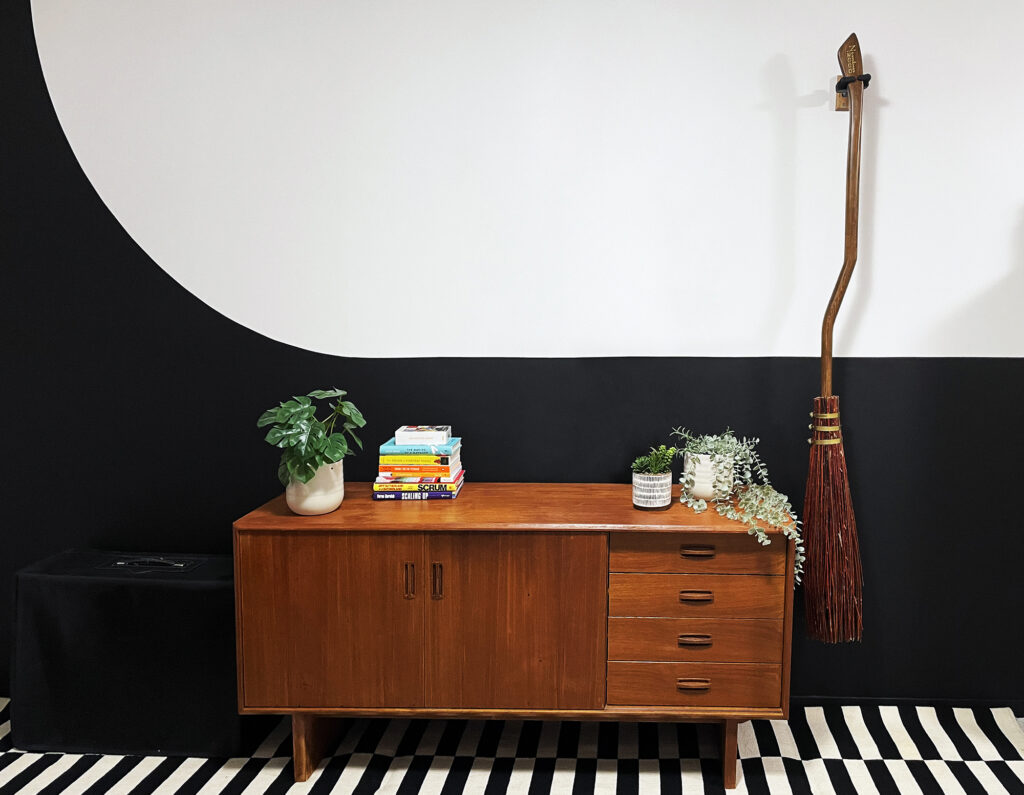
I’m so glad the template is useful! Thanks to your comment, I finally took a few ‘finished’ photos of my broom and added them to this post. I’m still not 100% happy with the way the bristles turned out and am considering reworking it… but that’s for another day.
I decided to skip adding the foot pegs/stand. They aren’t consistently on the Nimbus 2000 (for example when Harry unwraps the broom) so I didn’t feel too bad about not including them.
The bristles on my current version are 28″ long.
Happy broom making!