
It was late February when Kim mentioned that the cast of Back To The Future would be at the Calgary Expo. I spent the evening poring over the Expo website, checking ticket prices and schedules (there might also have been a bit of squealing). Not only would the cast be there, but Doc Brown (the inestimable Christopher Lloyd) was going to posing for fan photographs with a DeLorean. I was hooked.
Herein began a 2-month race to the finish for my first con/cosplay. I’d always been a bit envious of Kim and her costumed shenanigans each spring, and now it was my turn – featuring my favorite trilogy of all time.
The next day I kicked off costume planning. After my husband Jer volunteered to dress up with me (he doesn’t even like dressing up, best husband ever) and we got the kids in on it, I knew we had a big job ahead.
The first question was who to dress up as? Marty and Jennifer from the 80s? George and Lorraine at the Enchantment Under The Sea dance? Marty’s kids from the future? Or our final choice – Griff’s gang from 2015. Jer and I have always had a thing for hoverboards and the cheesy futuristic tech in the second movie, so it was an easy sell.
Researching Like Crazy
Once we had a theme to go on, I started my research by
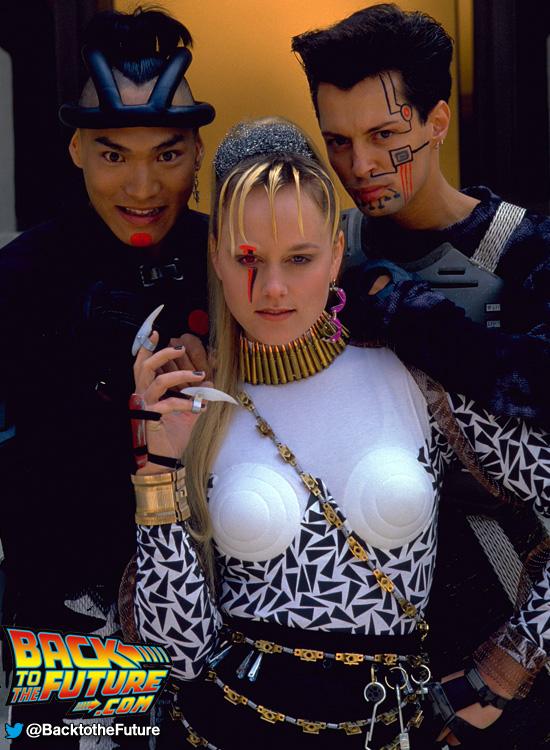
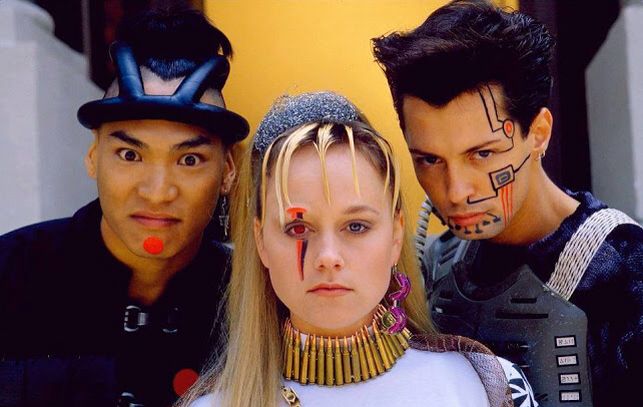
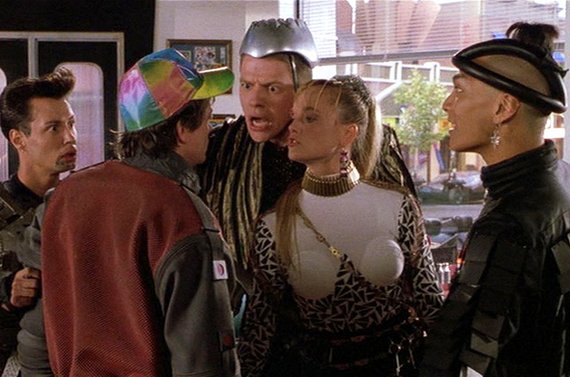
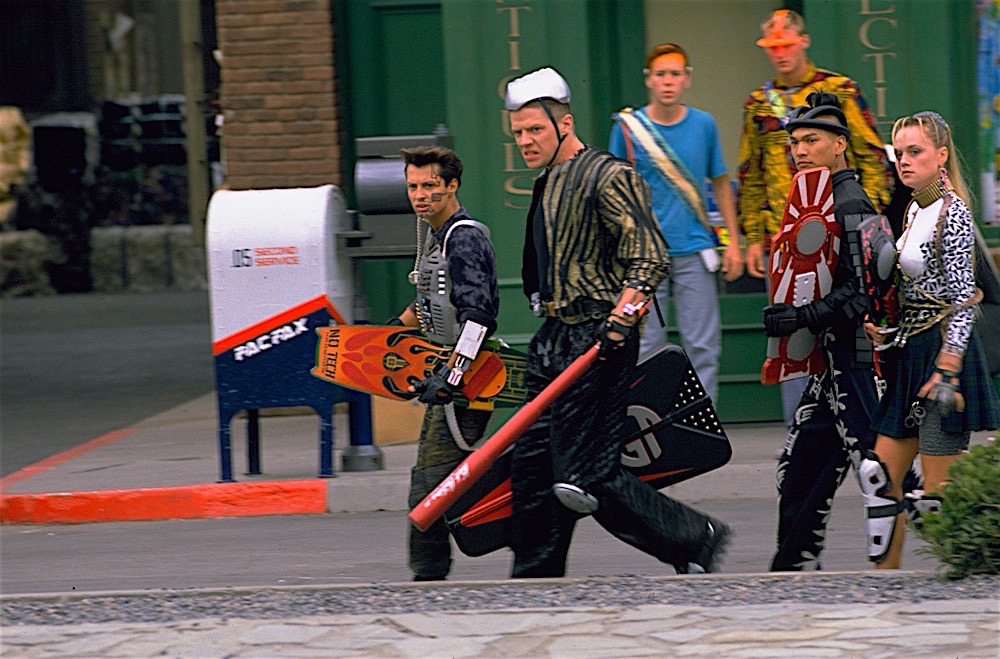
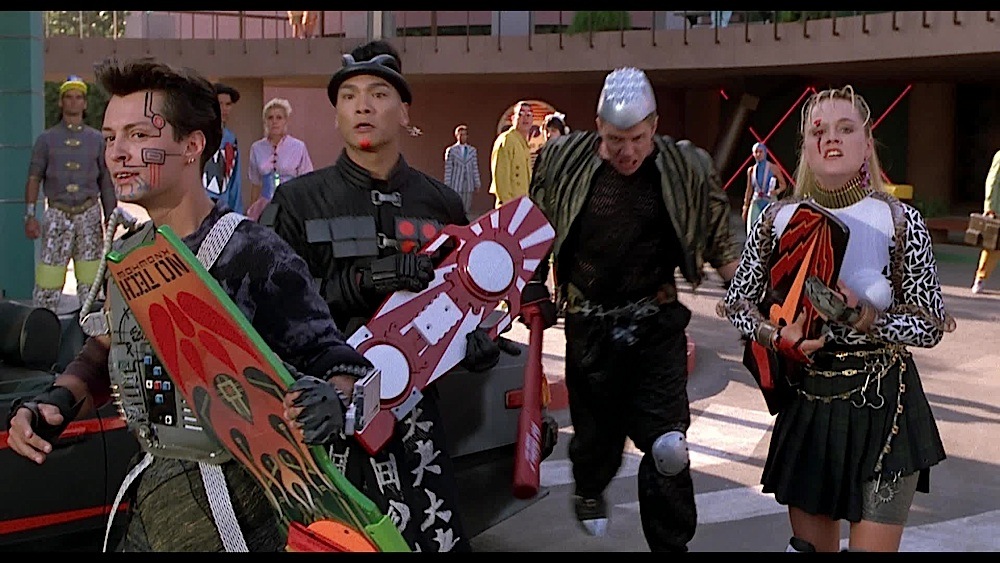
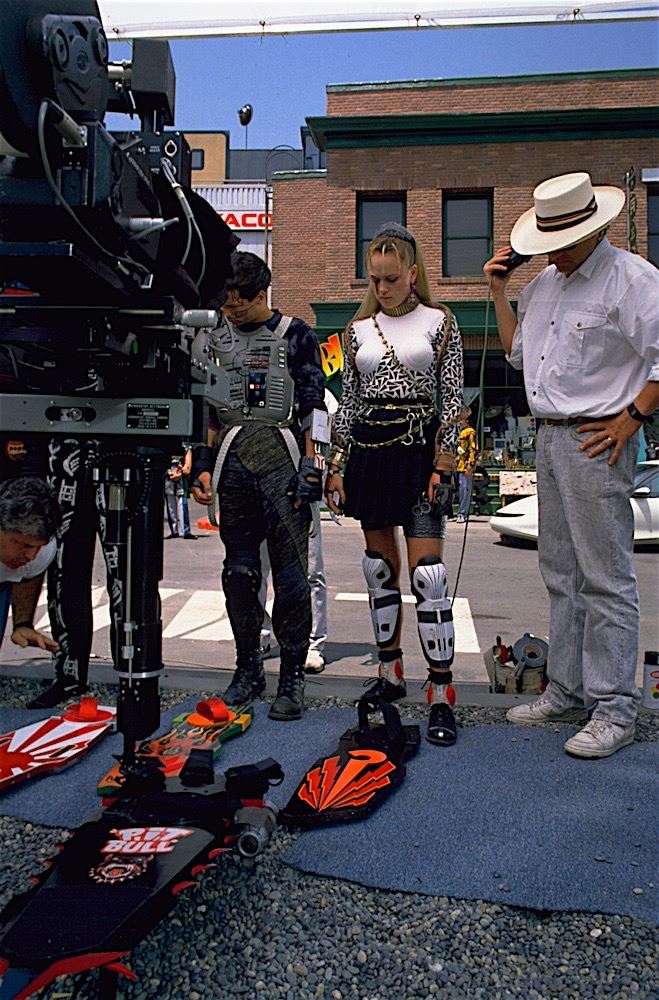
After a lot of internet-scouring, freeze-framing, and a bit of geeking out on the side (I maintain that Back To The Future: The Ultimate Visual History was worth every penny), I’d assembled a fairly clear set of source photos to work from, included below for all you would-be-costumers out there:


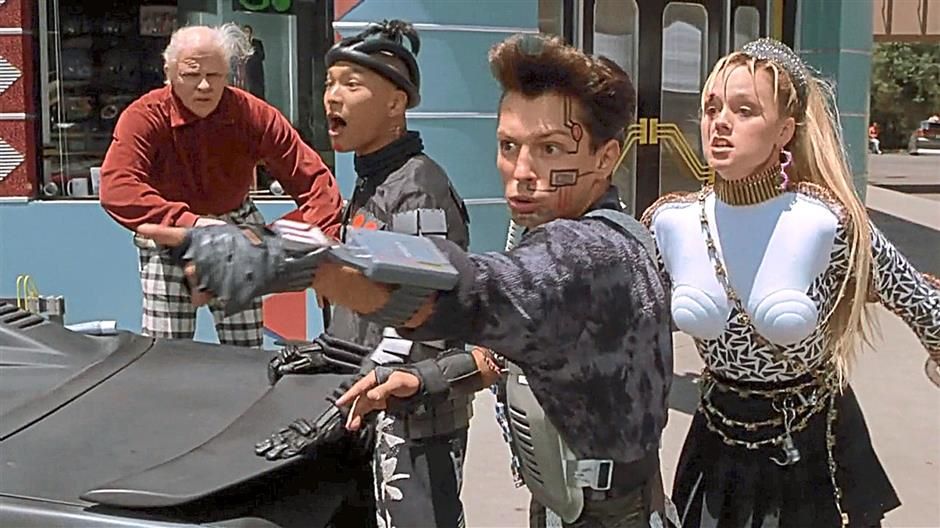


Breaking It Down
Once I had enough photos to reference, I tried to take the costume apart piece by piece. Which, it turns out, there are a lot of:
- A black and white bodysuit with a triangle pattern
- Chest cups
- Twisted tube/ribbon for around the arms
- Chain for over the shoulder and around the waist
- Pleated skirt – either black or dark plaid
- Rivets and metal circle details for the bottom of the skirt
- Grey speckled bicycle shorts
- Black shoes
- A whole lot of accessories:
- Silver metallic scrunchie
- A bullet necklace
- Two claw rings
A long dangling earring- Bracelets for both wrists
Hand guards – red on one side, black on the other- Shin guards
- Ankle protection
- And last but not least, a hoverboard. Easy to come by, right?

Once I knew which pieces I needed, I sat down to figure out which pieces could be ordered and altered vs which I’d have to make. Happily, many of the pieces were a combination of bought and made so it was just a matter of figuring out the supplies to order and the best process to put each together. Want to know how I made them? Read on.
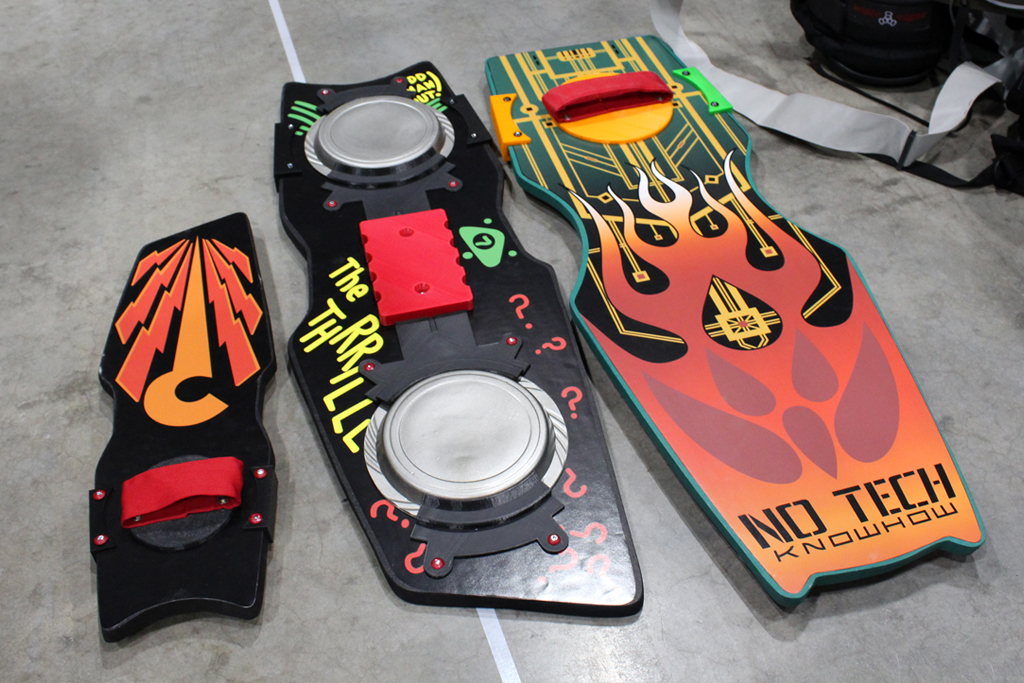
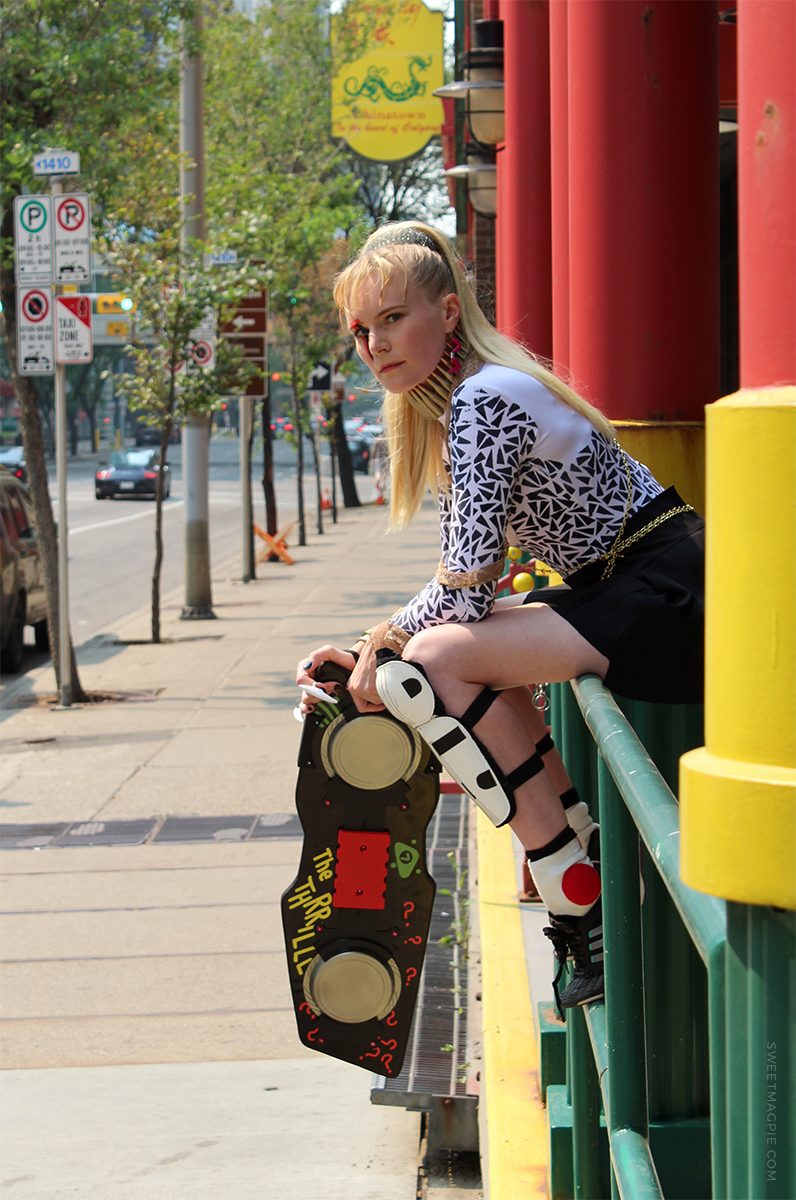
‘The Thrrilll’ Hoverboard
The making of this hoverboard
- Dig up every screenshot of the hoverboard known to man. Bemoan the quality.
- Do a lot of googling to discover a few fan prototypes. Find a gorgeous Spike hoverboard replica priced at $175 USD. Mourn the fact that you can’t afford this.
- Decide to recreate the design yourself in Illustrator. Spend way too much time doing this.
- Find out that custom decals are pricey! Order a poster print containing the front and back panels for $20 total.
- Cut out the printed panels, spray glue them onto foam (wood would be too heavy to carry all day), and get your husband to 3D print the plastic pieces (3D files available on Instructables) and mount them on the board.
- Sew a foot strap out of some leftover fabric and attach.
All of this means you end up with something fabulous to carry around that makes your minor character costume instantly recognizable. It also garners you some sweet compliments about the pro quality of your props:
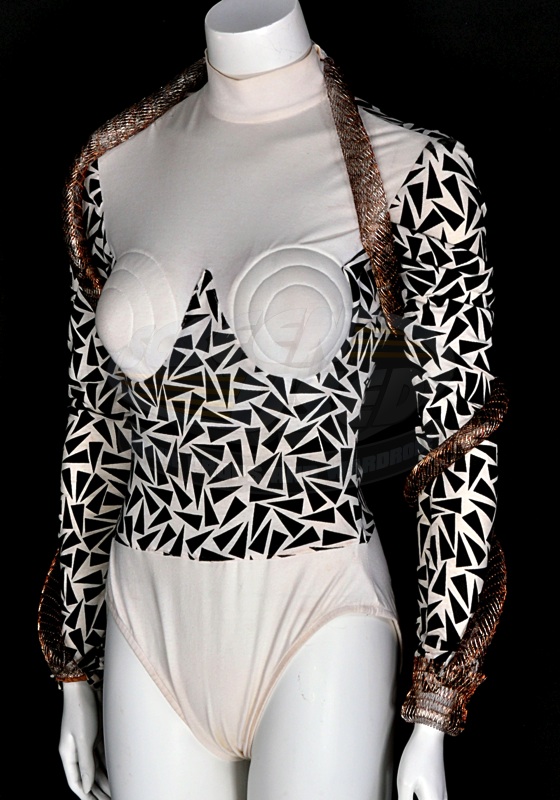
The Leotard
One of the most complex pieces of this outfit is Spike’s leotard. It’s not only a fitted stretch
I considered designing and ordering a custom fabric with the above triangle print on Spoonflower but was a bit apprehensive on that front. At this point, there was only a month until the expo and I wasn’t sure how long shipping would take. Once it shipped I would still have to figure out how to sew a body suit. And I’d never sewn with stretch fabric before, which made me doubly nervous.
So my first attempt involved making a duct tape body double of myself. I used this to draft and fit a custom cotton bodice, thinking that stenciling triangles to cotton would be easier than spandex. Although that might have been true, I was quite unhappy with how the bodice bunched up at the waist and it just wasn’t flexible enough to move with me.


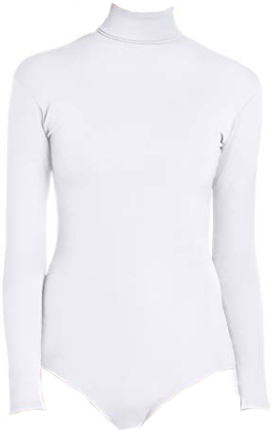
At this point I did what I probably should have done earlier – I just ordered a body suit from Amazon that was fairly close to what Darlene Vogel wore and stenciled the triangles onto it. Although there were cheaper leotards on Amazon, I was really glad I went with the Capezio Women’s Turtleneck Long Sleeve Leotard. It ran me about $34, fit well from the start, stretched well but was very opaque, and was fairly generous when it came to not showing off any lumps and bumps it shouldn’t. It’s also very comfortable.
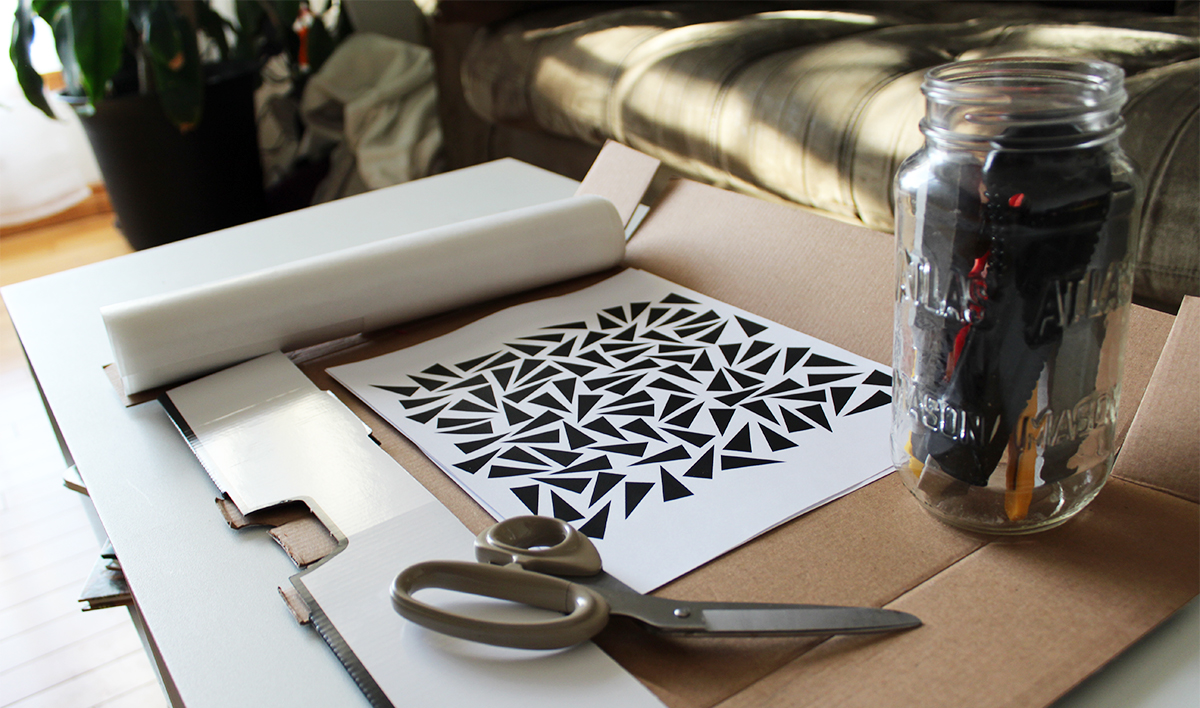
An evening of painstaking attention squinting at reference photos, I’d drafted up a close-to-scale version of the triangle pattern. If you’re making this costume as well, you can download my pattern and print it off to use for your own stencil:
Download the triangle pattern (PDF)
I printed off the pattern on an 8.5″ x 11″ sheet of paper. This was the basis for my stencils, of which I made three of by overlaying plastic on the printout and cutting out the triangles with an X-Acto knife. The cutting out took two solid evenings of Netflix watching to get through.
At this

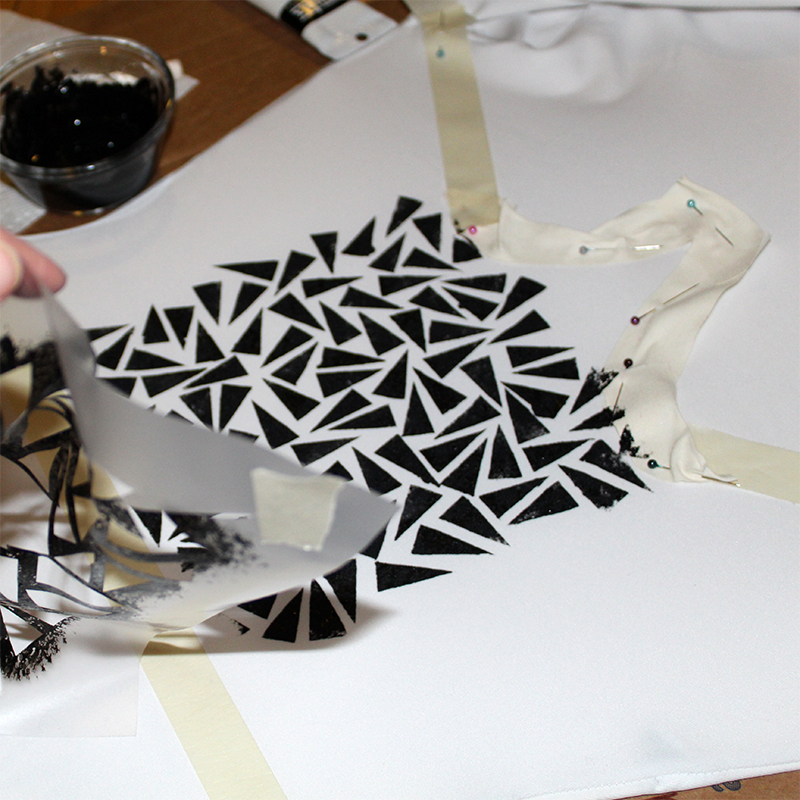
I wanted to plan around how the paint would look on the body suit once the fabric started to stretch, so I measured myself at shoulder, chest, waist, and hips. I halved my measurements and then made a rough body shape of thick cardboard to stretch the leotard over. This made sure the leotard was already stretched to the right size when the paint went on. It had the added benefit of ensuring that the paint didn’t leak through the other side of the fabric and cause an unsightly mess.
The next step was to tape off the areas where I wanted the paint with masking tape. The tape peeled off easily so I pinned it into place in a few spots as well. Once that was done the stenciling could begin! For this step you’ll need a cheap stencil brush – from the dollar store is fine – and some more time.

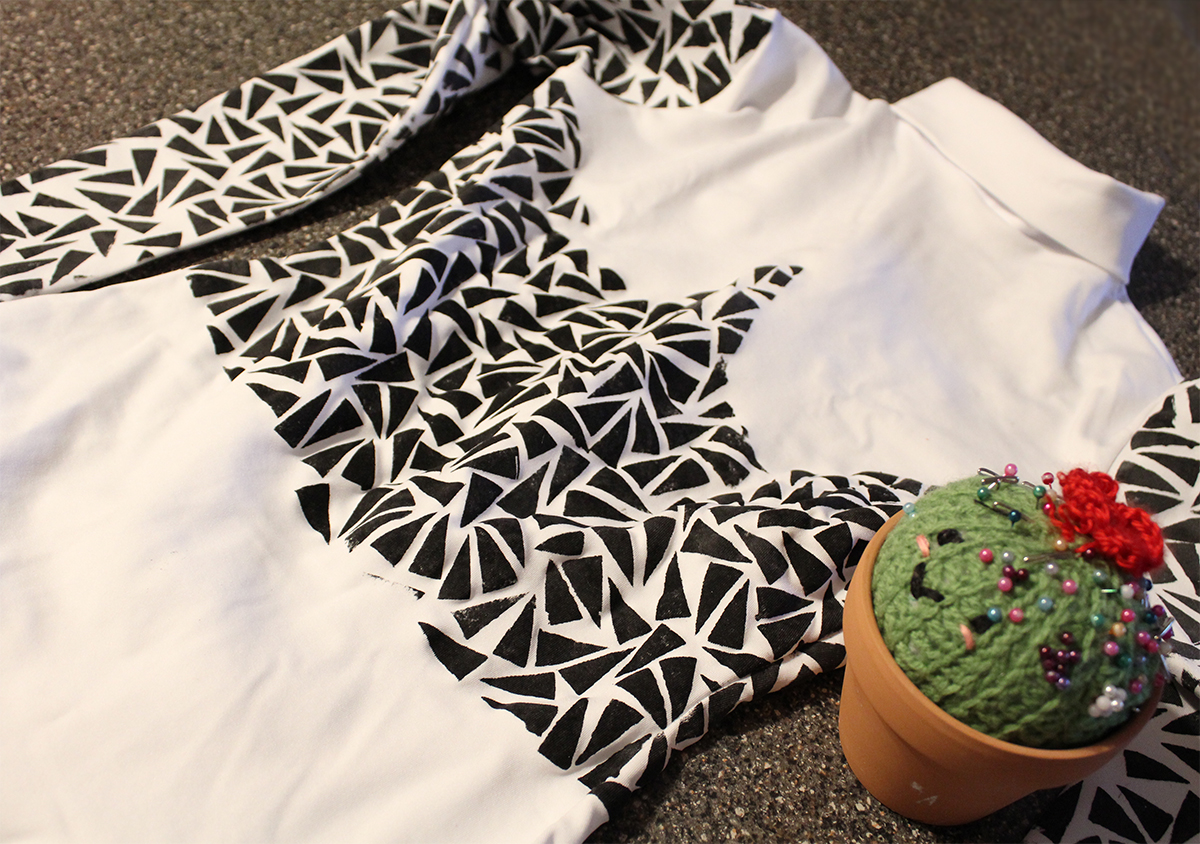
I almost didn’t leave enough time for this since it’s best to wait until each stencil section is dry before doing the next. There were 3 full repeats of the stencil on the front and 3 on the front, plus a few partials around the chest cups. The arms took 3 stencil repeats on each sleeve, front and back. This adds up to a lot of dry time, so I cut it back somewhat by making extra stencils so I could do both sleeves and a body piece at the same time. I had to wash and dry the stencil as well between uses so it wouldn’t smear on the white.
Adding Cups
At this point, I took a break and tried to figure out the best way to make the chest cups. My husband recommended trying Fosshape, a felt-like fabric that’s easy to sew and it heat-moldable. Meaning you can either use a heat gun, blow dryer, or clothing steamer to shape it. This melts the plastic fibers and enables the Fosshape to hold the shape you mold it to. Sounds pretty great, huh?
For the circular base used to mold the Fosshape on, I sliced one edge off of a foam sphere and covered it with aluminum foil so it would resist heat somewhat and not leave flakes of foam on the Fosshape. I tried shaping with the heat gun but found it melted the Fosshape too quickly and burned in spots where I wasn’t careful. A garment steamer provided a gentler, more even heat that was much easier to work with.
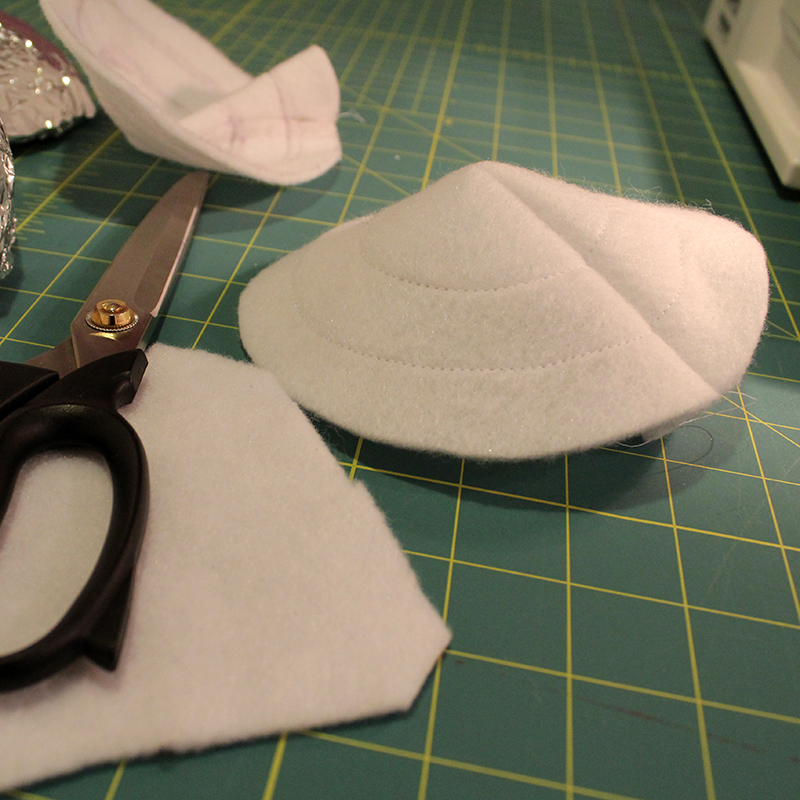
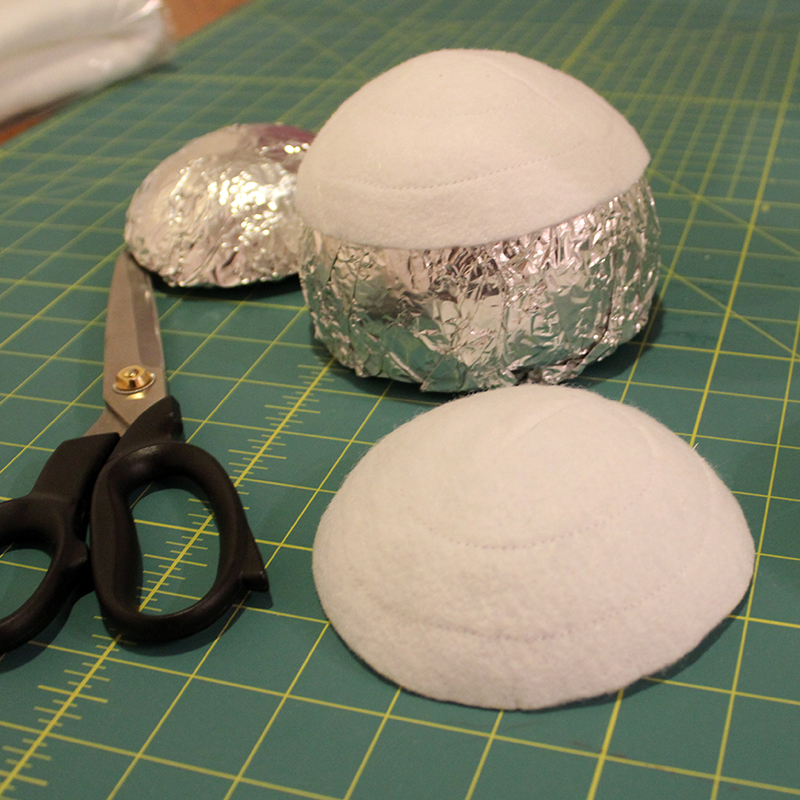

A bit of experimentation (as in the photo labeled Testing, above) showed me that although Fosshape is moldable by heat, too much heat makes the edges very stiff. When the plastic melts it also changes shape and can’t take in a lot of easing without wrinkling. The test on the left also shows my first attempt, where I stitched three different sized circles together before molding with a heat gun.
The final attempt, right, involved cutting out one large circle the size of my cereal bowls. I then traced out two smaller circles on the wrong side of the
After the cups were complete I tacked them to the leotard by hand. For my first day wearing the costume I’d tacked them on the morning of the con with just 3-4 stitches each and one fell off halfway through. Lesson learned. Next time I stitch them on better and bring a needle/thread as
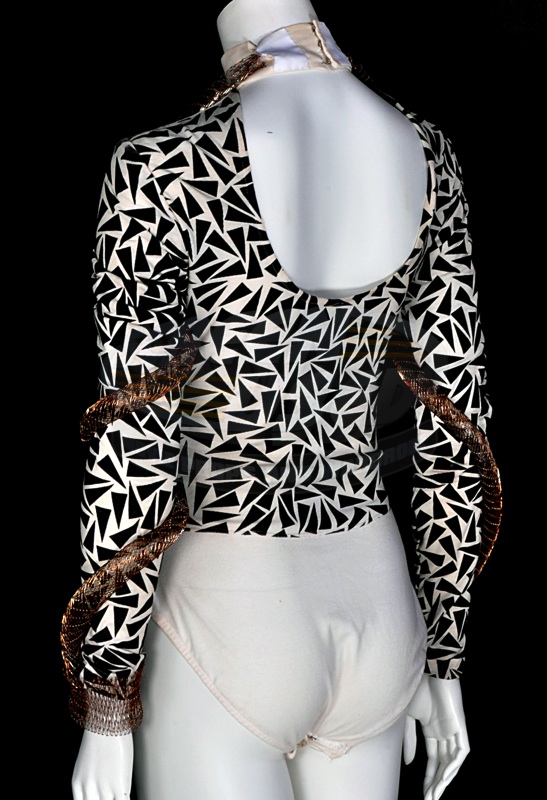
Ribbons and Chains
Spike’s leotard wouldn’t be complete without the bronze tube/ribbon twined around her arms. A search through Michael’s and a few hardware stores didn’t turn up any semi-transparent brass tubing, but they did reveal a roll of thick ribbon that could be stitched into a tube. The edges even contain wire to help it hold its shape.
All I had to do was reserve 2-3″ of ribbon for the bracelet on her left hand and seam the ribbon together by hand all the way along to make it a very long tube. Then I wrapped it around my arms as shown in the photos, stitched the ends onto the arms of my leotard, and called it a night. The ribbon did end up flattening out into a band over time. Next time I’d look for some clear plastic tubing to put inside to help it hold its shape.

The other feature that sets Spike’s costume apart is the chain she wears around her torso, below:


I wasn’t able to discover what kind of chain this actually was (plumbing? something custom?) and eventually had to give up the search. I ended up going to Home Depot and just buying 15 feet of medium-weight gold chain. I stitched the chain on the first time, but since the chain wraps around very thoroughly it needs to be removable to get the costume off. The second time around I used 3 gold safety pins to hold it on, which worked great – 1 just behind the shoulder, and 1 at each hip.
Skirt and Shorts
If you look very closely at some of the source photos you’ll see that Spike’s skirt is a dark blue and green plaid. But when the editing team was through and the film’s contrast increased, it looked black in most shots. This gave me a few options to explore, so I just went to the local thrift store and bought whatever was closest. This turned out to be a calf-length black pleated skirt several sizes too big, which was perfect for the job.
The skirt required a few modifications – first, removing the elastic waistband and shortening to the right length. Then I took in the sides and added a side zipper. The left side of the skirt is several inches higher than the right so I trimmed a few inches off of the skirt to match Spike’s outfit. Since the material was synthetic, I melted the edges the bottom seam with a lighter to keep them from fraying rather than having to hem.

Spike’s skirt also has some pretty amazing hardware attached to it with grommets. Though I couldn’t easily replicate the gears on such short notice, I opted to add grommets to the skirt (purchased from a fabric store) and then attached keychain rings and a few washer-type pieces of hardware to the grommets.
Spike wears a pair of textured grey leggings under her skirt which you mostly see in action shots. I managed to track down a fairly similar pair of leggings at H&M for $5 and trimmed them down to bicycle short length. This led to my first attempt at using the stretch stitch on my sewing machine, which I hadn’t realized was a thing until this project. It was a little less scary than I’d thought, especially after testing the stitches on some extra fabric and watching a few tutorials on YouTube.
Shin & Ankle Guards
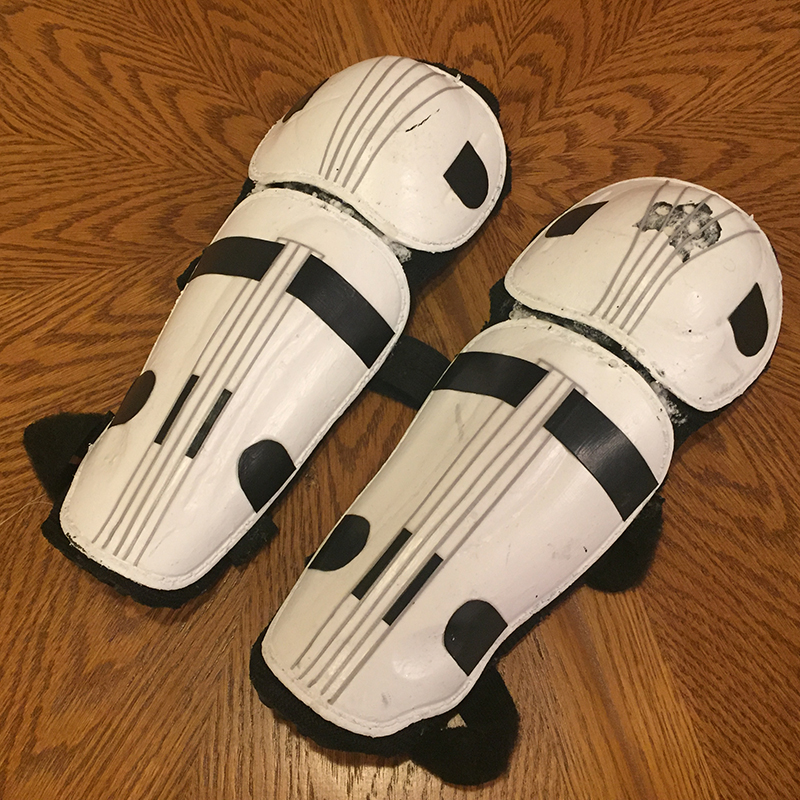
In keeping with the costume’s cross between ’80s punk and athlete, Spike wears shin guards and ankle guards with her black leather shoes. I turned to trusty VarageSale at this point to find something that was the right shape.
The shin guards I bought had a similar shape for the plastic part, but the black foam/padding around the edges was all wrong. I trimmed down the edges to approximate the shape of Spike’s guards and melted them to seal with a lighter.
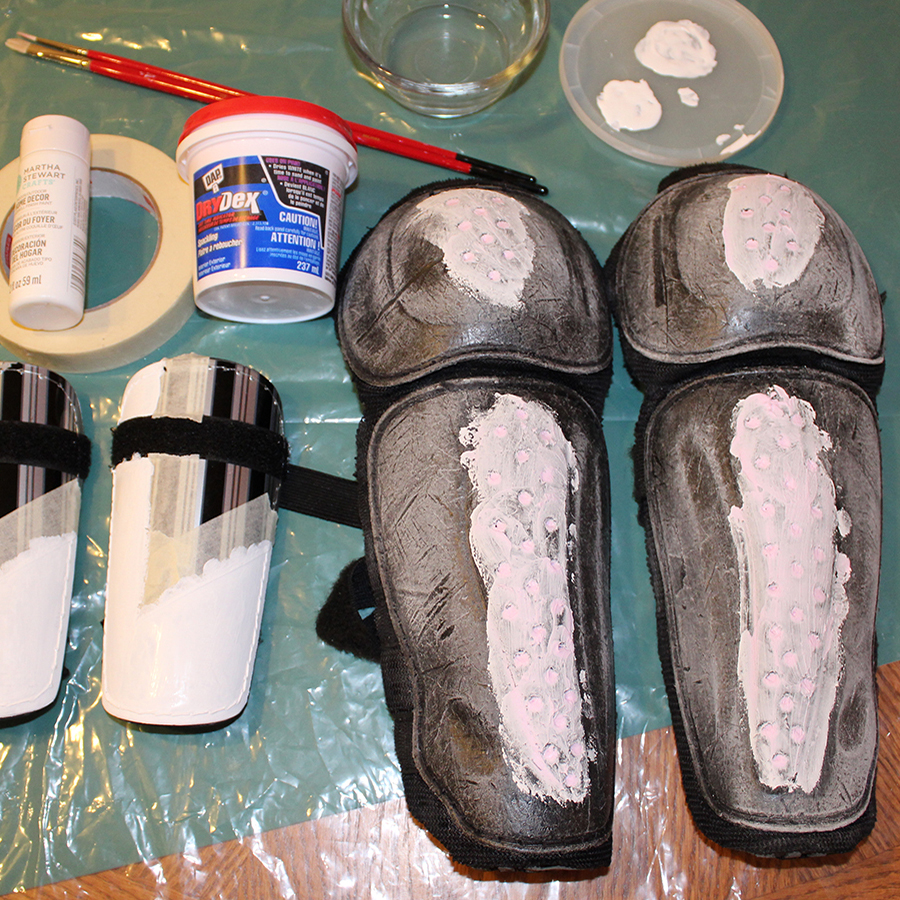
Since the plastic front of my shin guards was black and had holes across the front, I filled the holes with drywall filler and sanded down to a smooth finish. Then the front got several coats of white acrylic paint and a few days to dry.
The details were made by trimming down light gray and black scrapbook paper into the shapes from Spike’s shin guards and attached using Mod Podge. Once the glue dried the details into place I covered with 3 more layers of Mod Podge to seal everything and keep it in place.


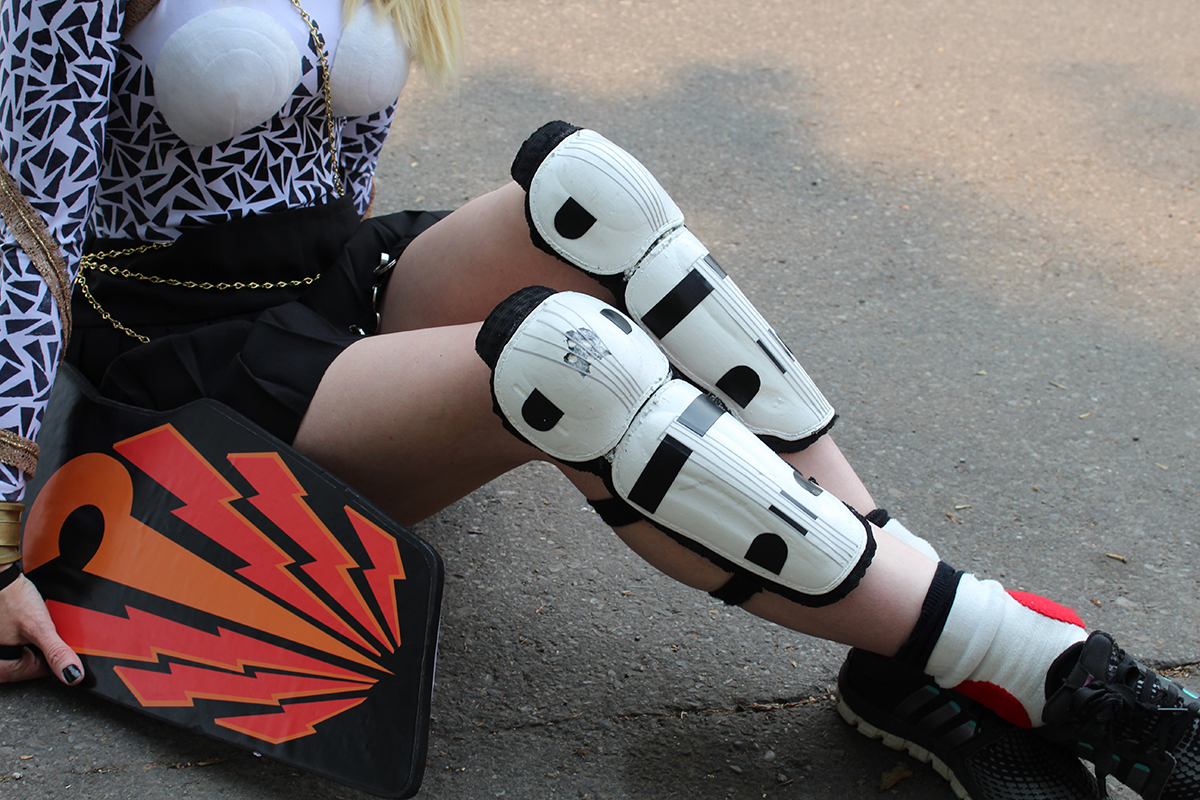
The ankle guards were fairly easy once I figured out what they were – the bottom part of shin guards for soccer. So it was just a matter of picking a pair up and stitching a 2.5″ red felt circle on each side. Pair those up with some black slouch socks and you’re ready to go!
All The Bling
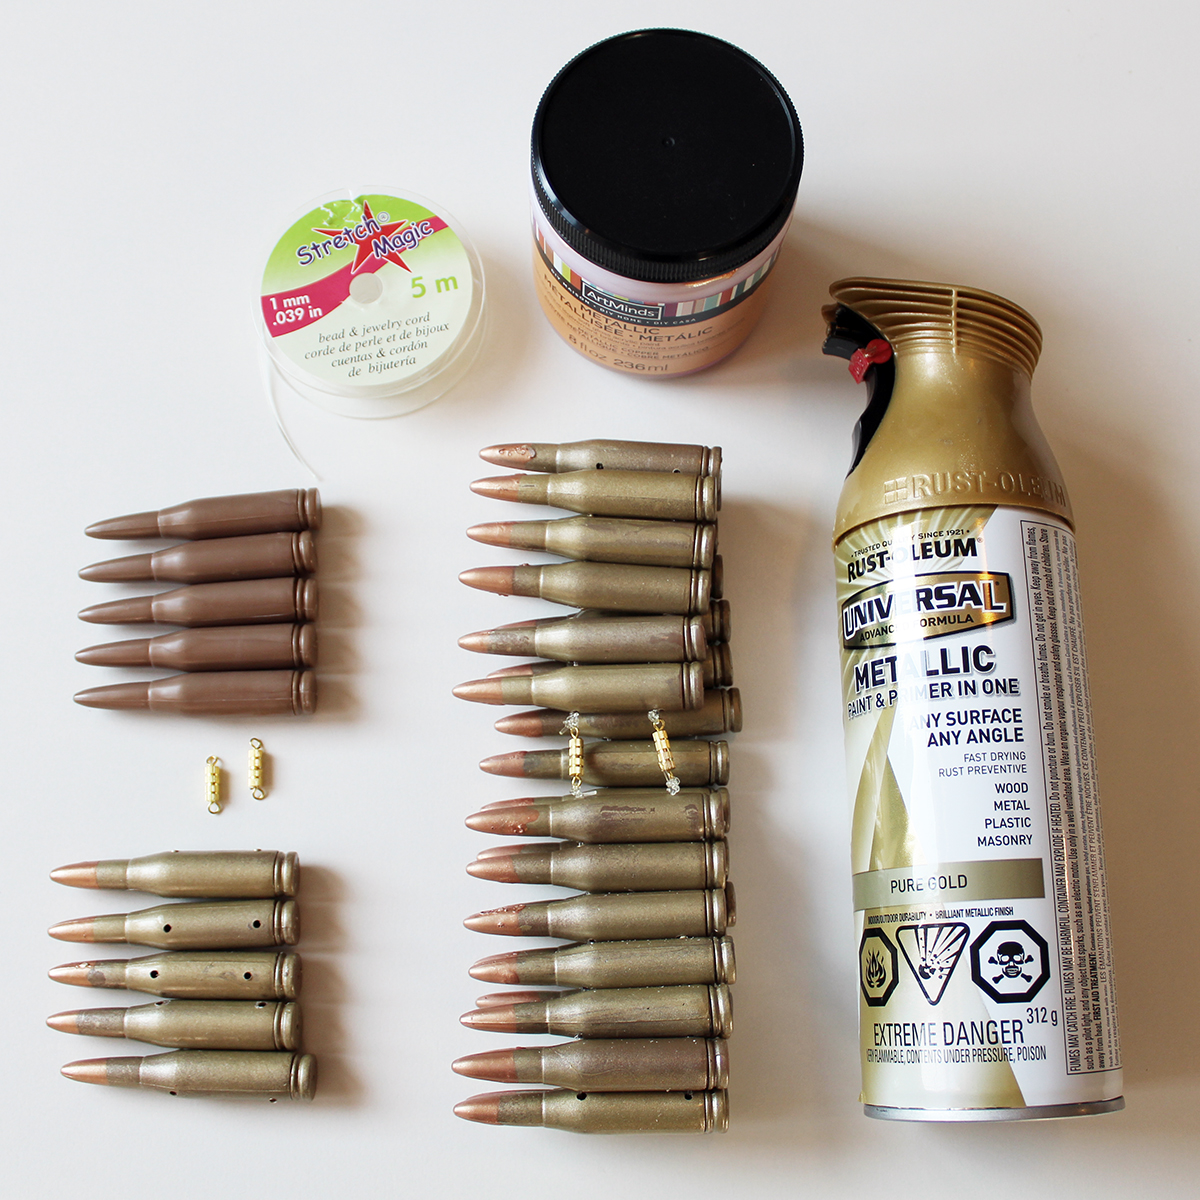
Spike must have been a big fan of accessorizing because there are so many little pieces to this costume! First up was the bullet necklace. I looked into buying real bullets but decided against it due to budget, the issue of procuring and rendering impotent live ammo, and an unfamiliarity in working with metal. Thus, the bullet belt.
Our local costume store sells a “Western Bullet Belt” for $13 (similar to this one on Amazon). These plastic bullets are attached with a slip-off connector so it was very easy to disassemble. The bullets are a larger scale than the ones from the movie, but close enough that they worked.
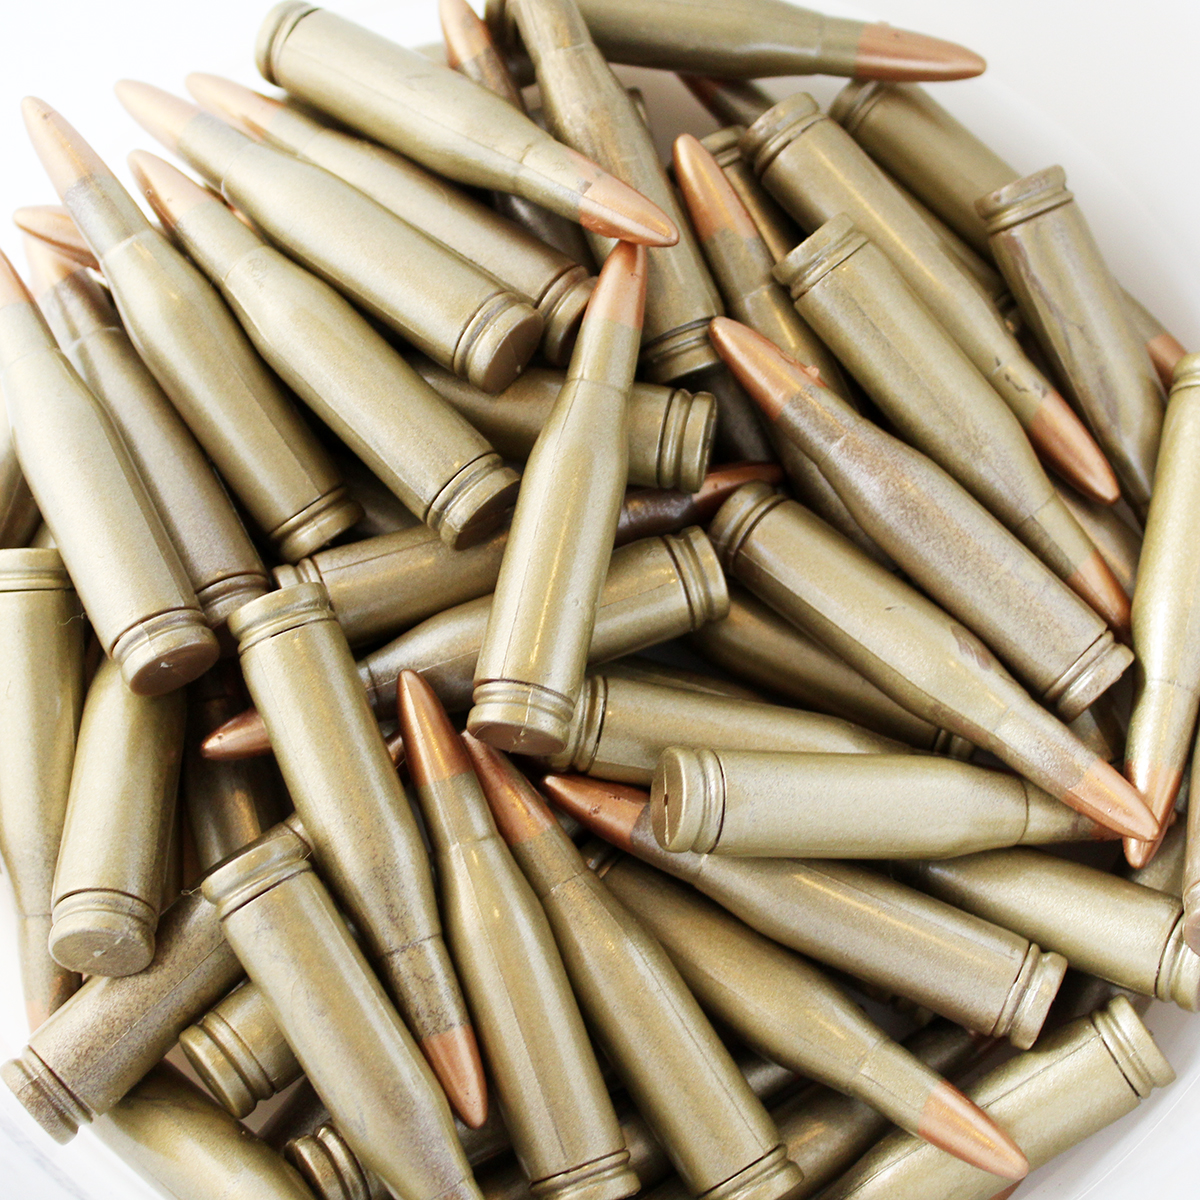
The bullets are an unpleasing shade of brown, however, so I sprayed them with a can of Rustoleum Metallic Paint & Primer In One (Pure Gold), and dipped the ends in
Other supplies you’ll need include some Stretch Magic bead & jewelry cord (about $5 at Michael’s) and a few jewelry clasps. My brother in law drilled 2 sets of holes in each bullet so we could string the cord through and add clasps (thanks Adam!). If you were more perfectionist than I was the night before the expo, I’d also recommend laying out the drilled bullets side by side to find the ones where the holes line up the closest before stringing them on the cord so they lie flat when worn. You can see a few of mine were crooked if you look closely.
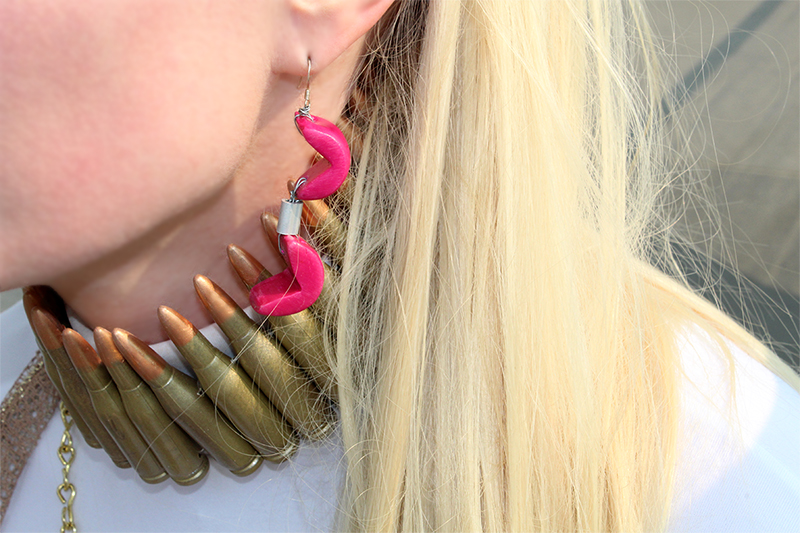
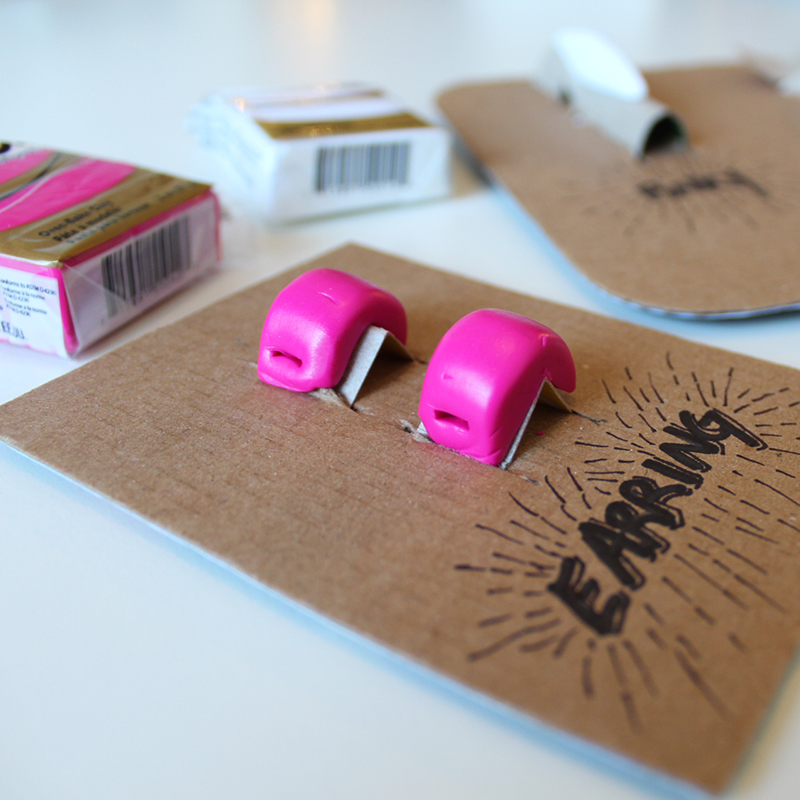
Spike wears a purple/pink plastic earring in her left ear and two white claw rings on her right hand. This turned into my first foray into the world of Sculpey. Sculpey is a plastic clay that you mold by hand and then bake in the oven until the plastic fuses together.
I picked up a pack of Premo! Sculpey in white and hot pink, along with a jar of Sculpey Gloss Glaze to make my earring shiny. My first step was to do a lot of Googling on how to use Sculpey properly. The main points were:
- Bake at the proper temperature. I failed here since I wrote down the wrong temperature for my clay. The clay still bonded properly, it just darkened and I ended up having to paint over it with acrylic paint to get the right color.
- The clay will pick up fuzz/lint/dirt from your hands and anything it touches. Start with clean hands. Don’t touch dirty stuff and then your clay.
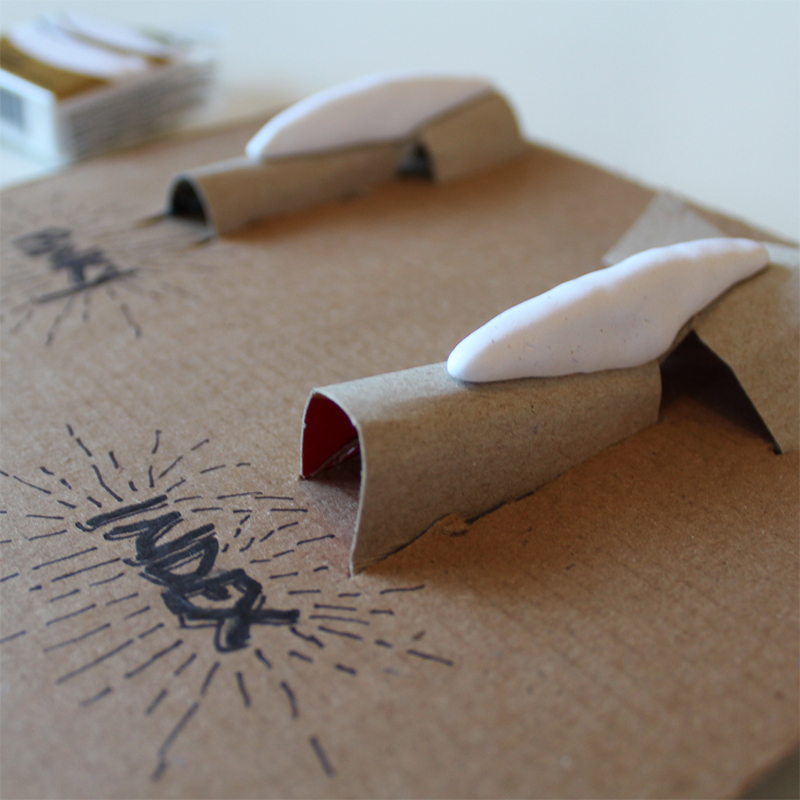
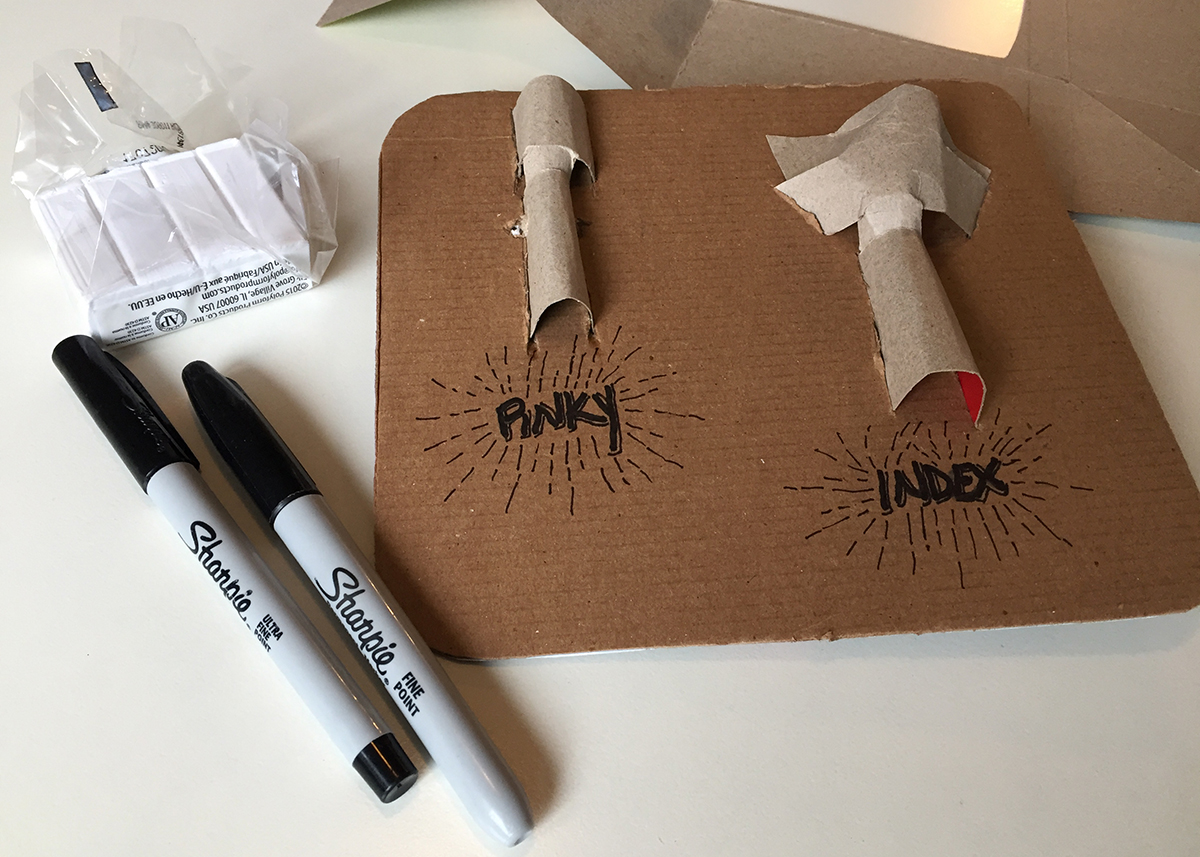
I figured the best way to make the claw rings the right shape would be to make cardboard approximations of my fingers to mold and bake on. This worked out surprisingly well and was also fun as I figured out how to make them stay in shape with no tape.

The earrings were finished off by using some silver wire, an earring hook, and a metal piece I picked up at the hardware store. 20 minutes of fiddling later and the earring was good to go.
The rings needed a little more work. I found 2 toe rings at Claire’s (Turquoise Stone Silver Toe Rings). These turned out to be a great choice since the claw rings sit above the first knuckle on the finger and needed to be smaller than your average ring. This also made them very size adjustable once they were made.
Once the white Sculpey claws cooled, my husband removed the stones from each toe ring and drilled a small hole in the top. We then used a tiny screw to attach the ring to the claw before filling the edges with a two-part epoxy putty. Once this had dried I gave the putty and claw sections a few coats of white acrylic paint.
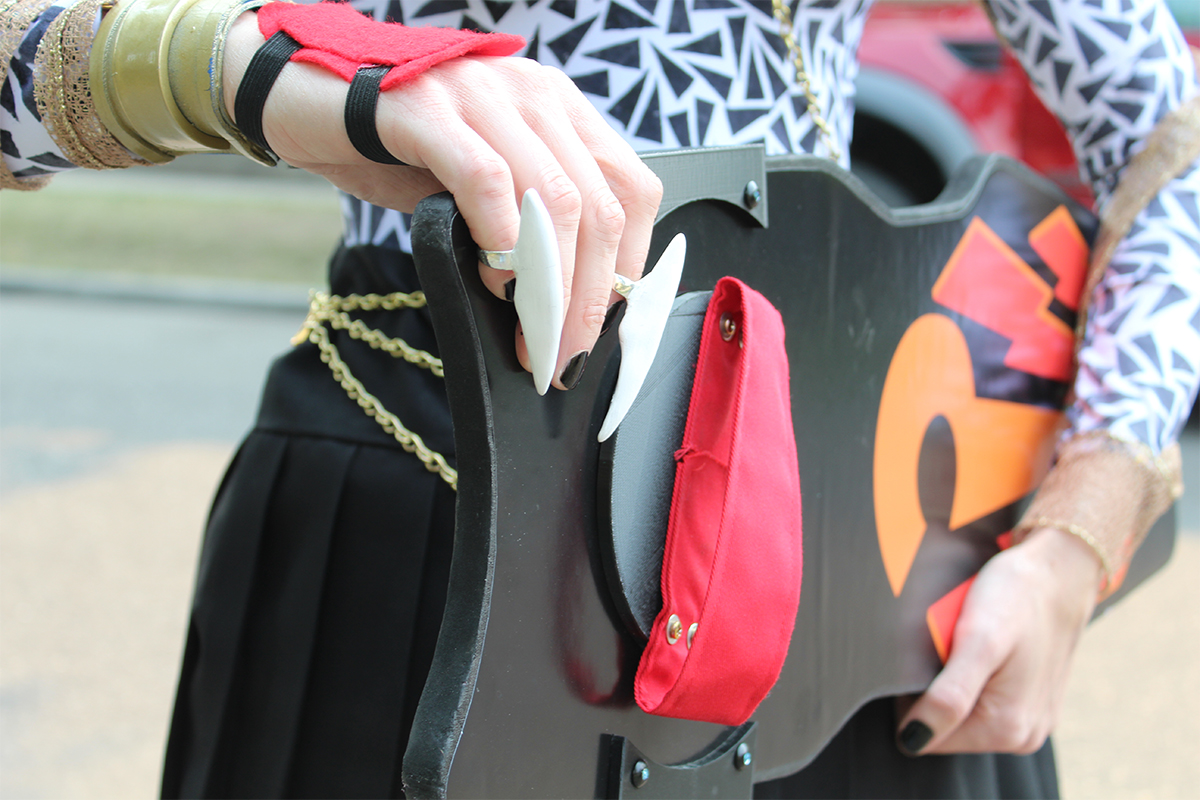
The bracelet for my right hand was fairly straight forward. I found a bracelet with a hinge at a second hand store for the center, then cut out craft foam to extend at the top and bottom. A second layer was hot glued to the top and bottom edges to provide some depth, and two crystals hot glued on for a bit of detail. Then the whole mess was spray painted gold to match my bullet necklace.
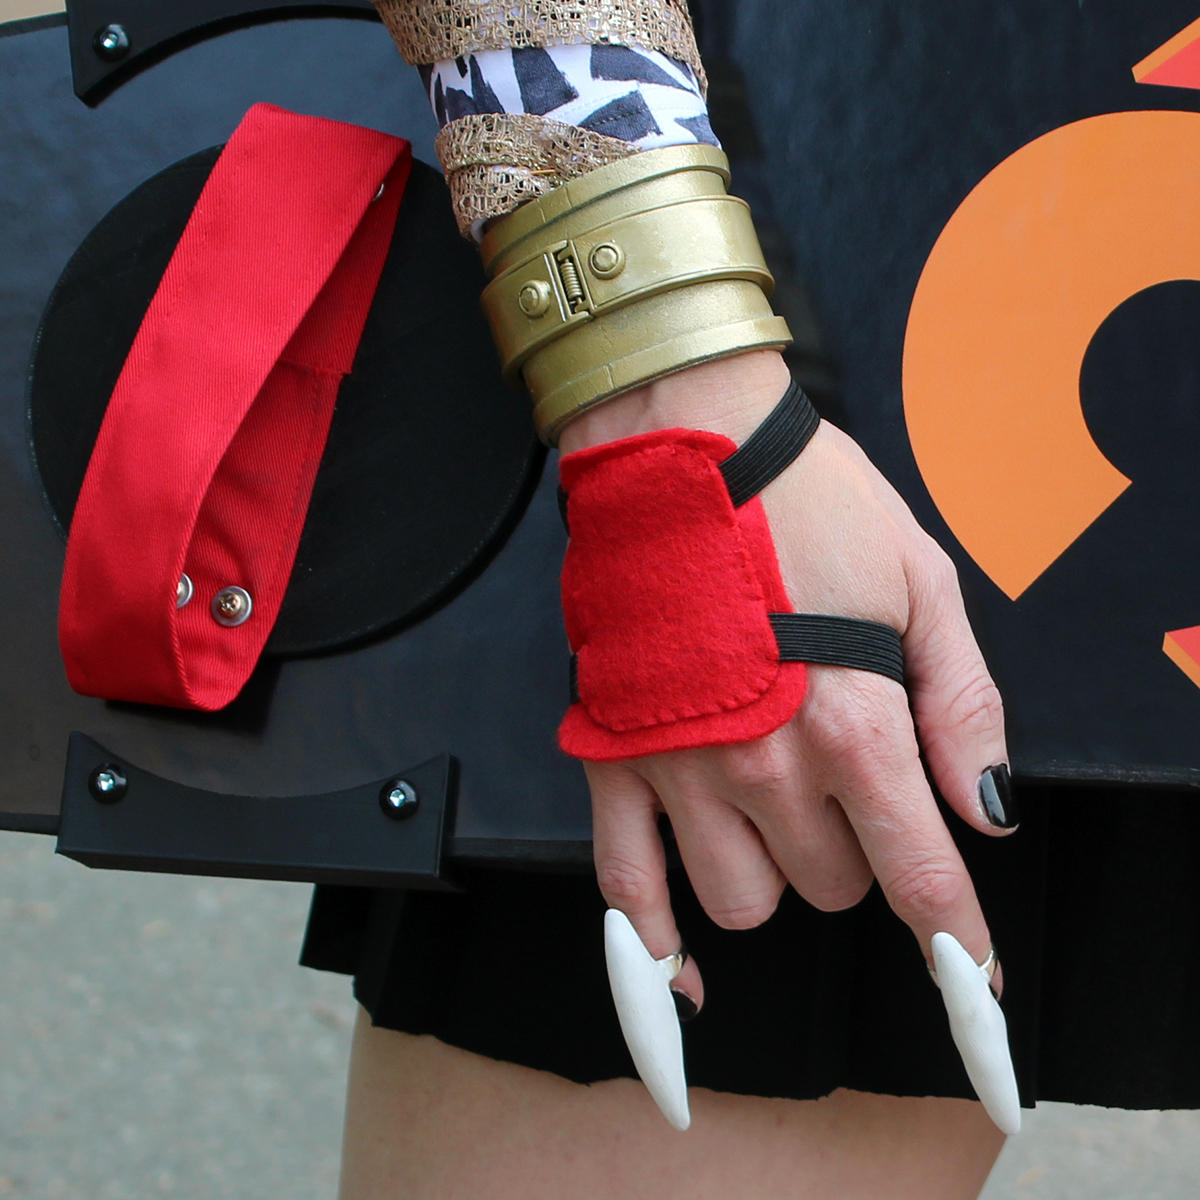

The red hand guard was made out of some cheap red craft felt and sewing elastic purchased at the fabric store. The original costume had black writing or drawing on the top as well, but I wasn’t able to find a close enough photo to find out what was drawn on it.
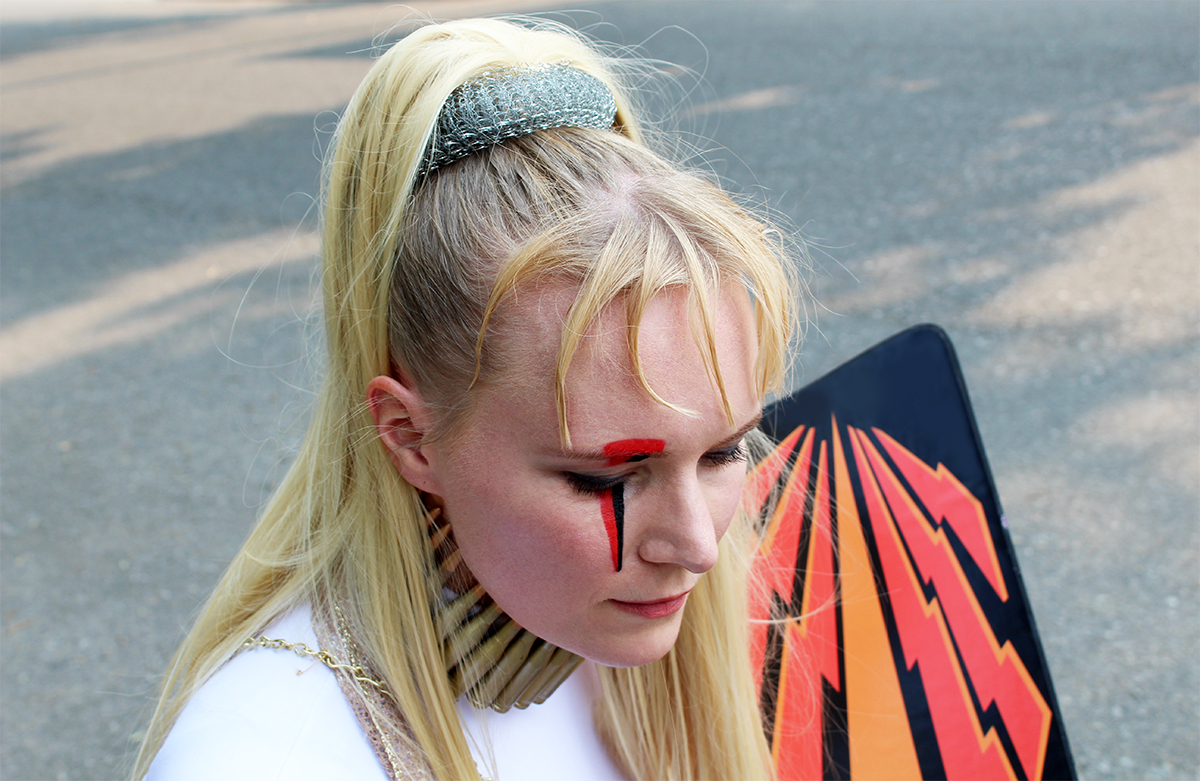
Hair and Makeup
Spike’s hair is this great shade of semi-natural blonde, with bleached out bangs. Her ponytail is a lot lighter than her roots which helped a lot – no need to match your ponytail to your natural hair color. Since I’m naturally a dark blonde
The ponytail is a double set of blonde ponytail extensions from Amazon. To keep the ponytails from falling out of my naturally slippery hair, I pulled my hair back into a bun and then tied the extensions around the bun. The metal scrunchie is a dollar store pot scrubber that I cut the middle out of.
The black fingernails were an easy fix with a bottle of black Sally Hansen Insta-Dry Nail Color. I prefer this over some of the more expensive brands because of its great coverage – 2 coats
The eye makeup was done with an
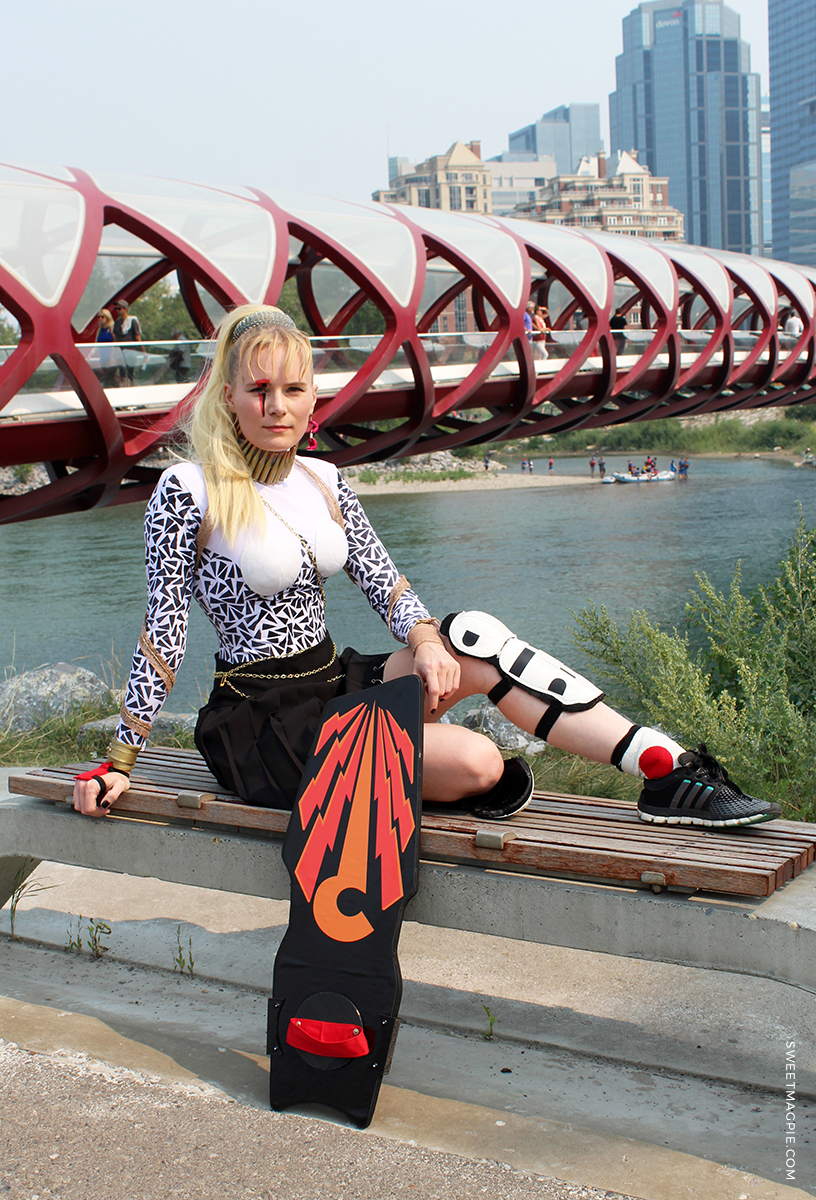
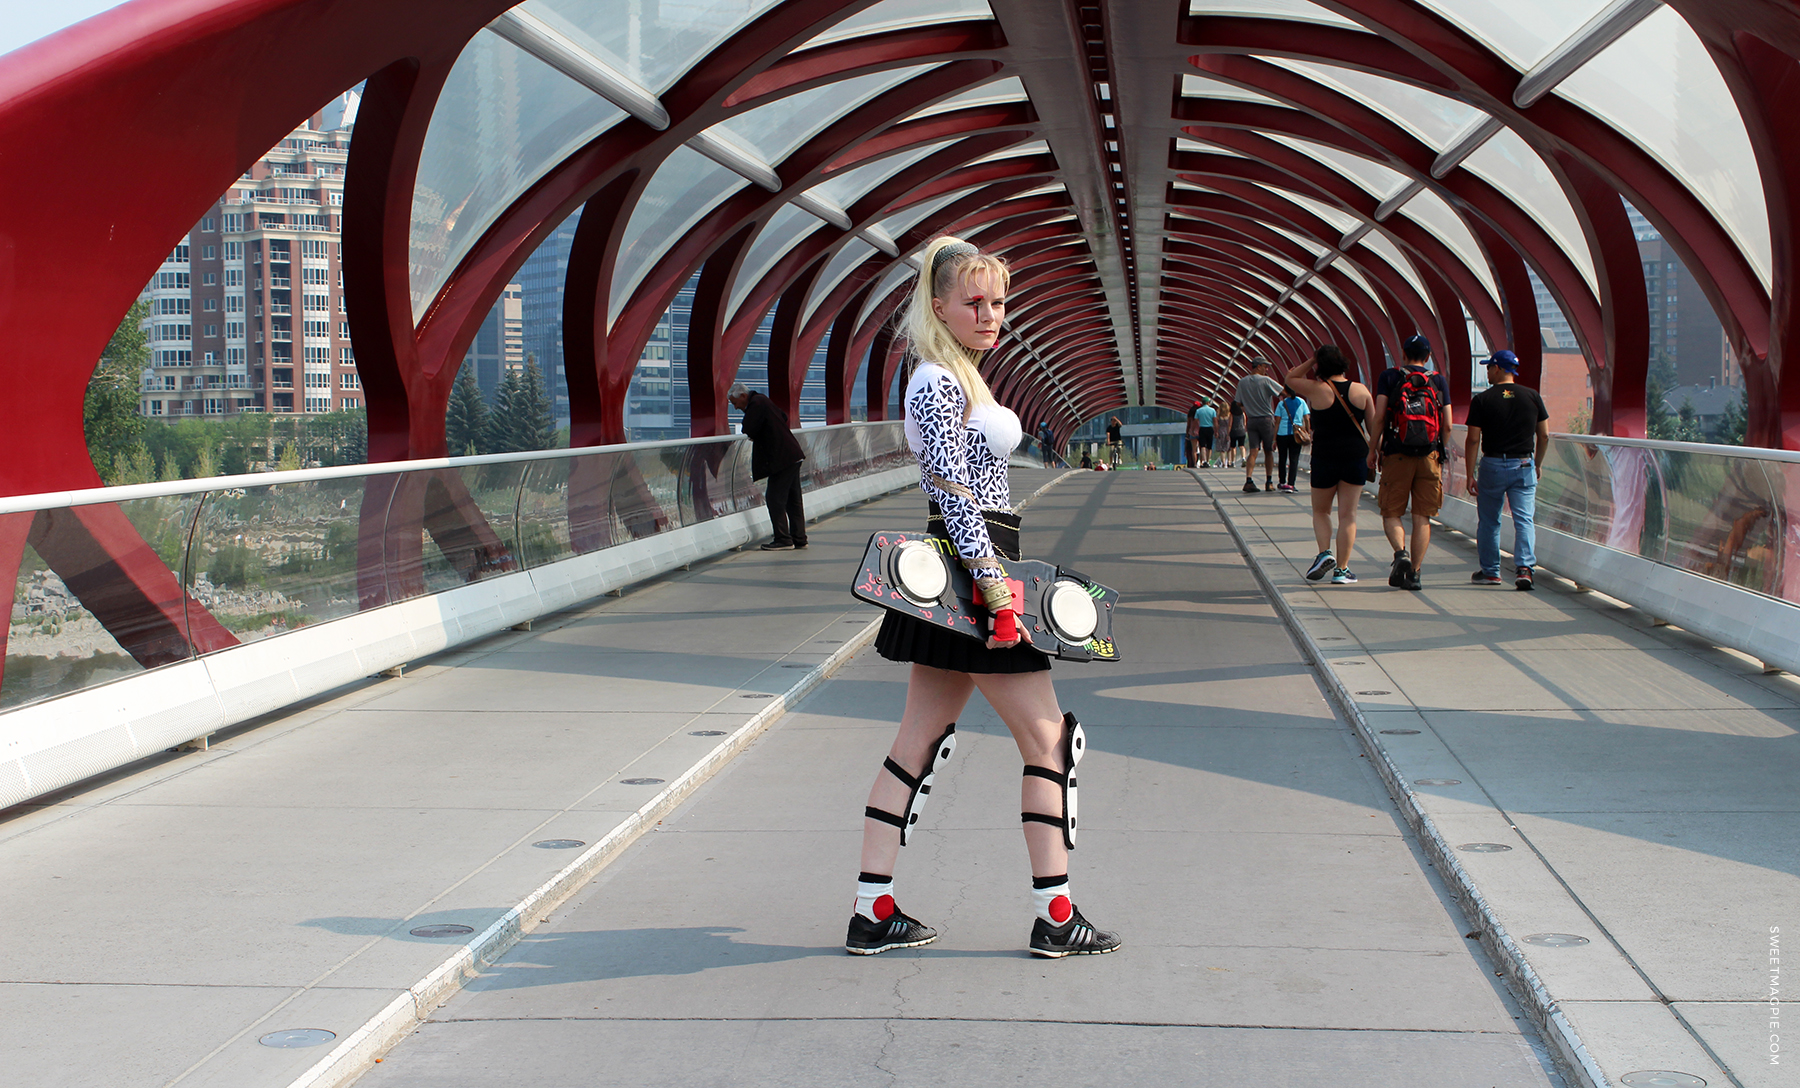
The Best Part
The culmination of all this work and effort is, of course, the actual cosplay. Although I get immense satisfaction from all the making that goes on, I must admit that my favorite part is getting to wear the costume out and about. .
Seeing people’s reactions to what I’ve made is so enjoyable, whether they’re realizing I’m in costume or just think I’m offbeat. These are the moments that stick out best:
- A compliment from an Entertainment Expo staffer who not only recognized the costume but also knew of the actress who had played the part. He was impressed by our super sweet hoverboards.
- A guy who drove by and yelled out the window to ask where my DeLorean was (hey, at least he got the costume!)
- An older gentleman out for a stroll with his wife: “That look is really wild, but it works on you!”
- Darlene Vogel (Spike’s actress) e-mentioned that a friend had forwarded her a photo of our costume!
My friend Denitsa and I took an afternoon out on the town to give my Spike costume a spin – and to take photos to share. All the photos below are thanks to her skill behind the lens


One reply on “Becoming Spike – a Back To The Future 2 costume”
[…] dad and I have this thing for Back To The Future. I might have mentioned it before (see my sweet hoverboard costume post). But this story is one less about me and more about my father. Renting a VCR to watch the […]