Last year our local entertainment expo brought the cast of Back To The Future to town. I was bouncing around the house in excitement when I first heard the news since that’s my favorite trilogy of all time. Seriously just so good. I re-watched the trilogy, introduced it to my kids, and then got down to business.
2 months and an 80’s punk makeover later, I was Spike, a member of Griff’s gang from 2015:
The Hoverboards
Planning the hoverboards was one of my favorite parts of making this costume. It gave me a chance to geek out in Illustrator with an attention to detail that warmed the cockles of my heart. I started out with just creating the 2 hoverboards my husband, daughter and I needed for our costumes:

Once I was on a roll though, it was hard to stop. After the “odd man out/the
Download the hoverboard graphics
Want to make your own hoverboard? I’ve recreated the graphics and put together a high-res JPG of each so you can print them off yourself. Each hoverboard has a black line around the outside that you can trace on to your foam or plywood to get a perfectly even edge around the graphic.
For a full-scale hoverboard just print off at 100% on a 24″ x 36″ sized poster. I ordered mine printed at Vistaprint with a coupon code that made each print about $20.
Cut Out Your Own Hoverboard
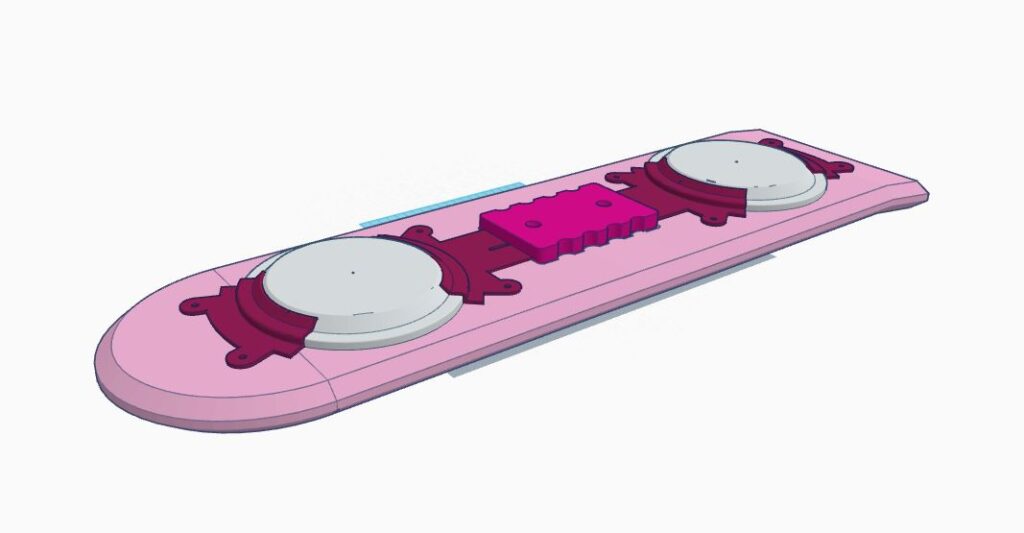
I had a request recently for vector outlines, so that the hoverboards could be cut out on CNC machines or 3D printed. So.. here you go! Just click the image below to download a vector PDF.
How we made our hoverboards
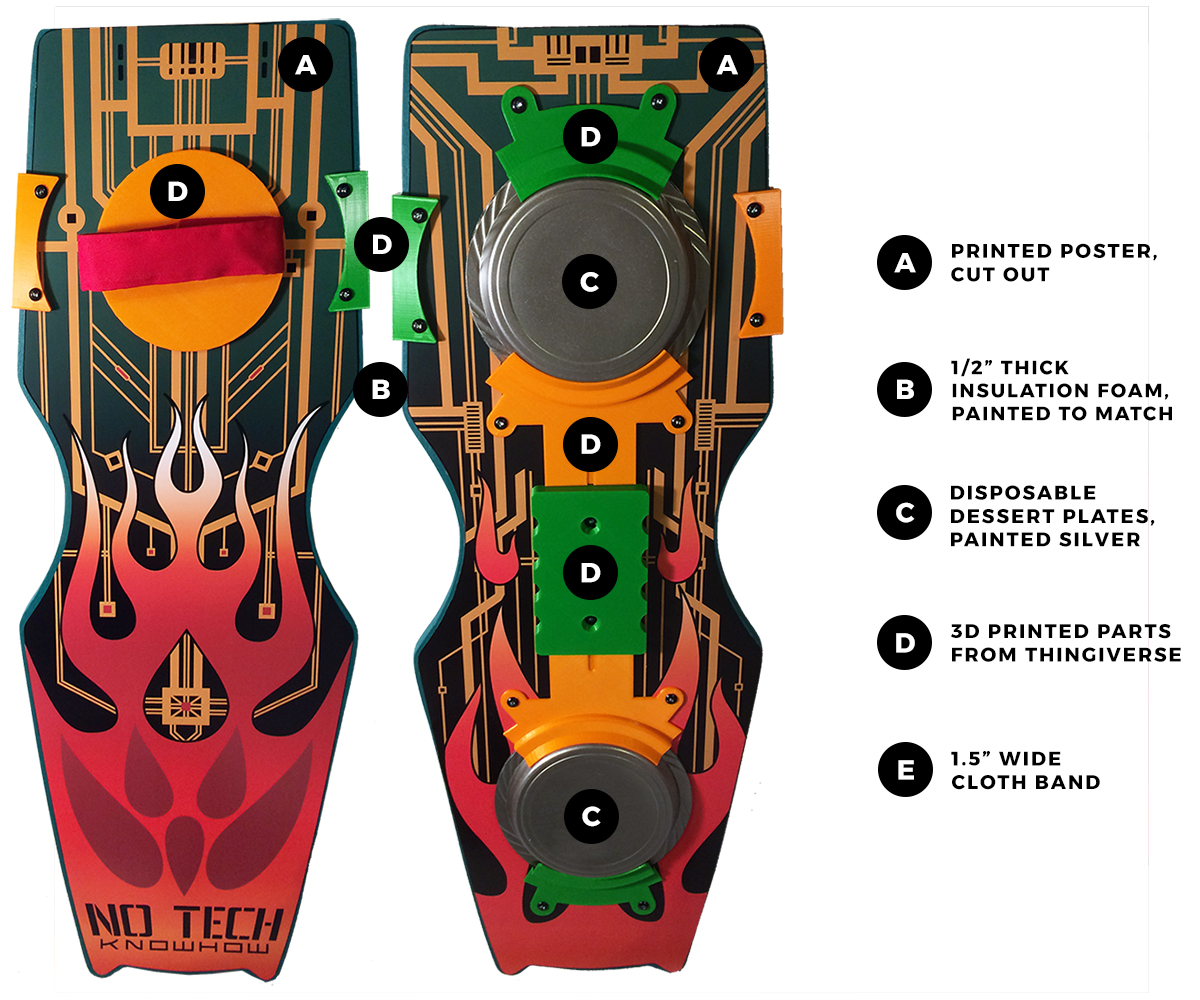
Once I had the graphics designed we ordered them from Vistaprint. While we were impatiently awaiting the mail, we went out to Home Depot and picked up a sheet of 1/2″ thick insulation foam (Foamular C-200) for $10.
We cut the foam to the shape of the outer stencil included in the poster, painted the edges to match the movie hoverboard, and glued the graphic on the top and bottom. I’ve included a few photos of my handy helping husband to show the general process:
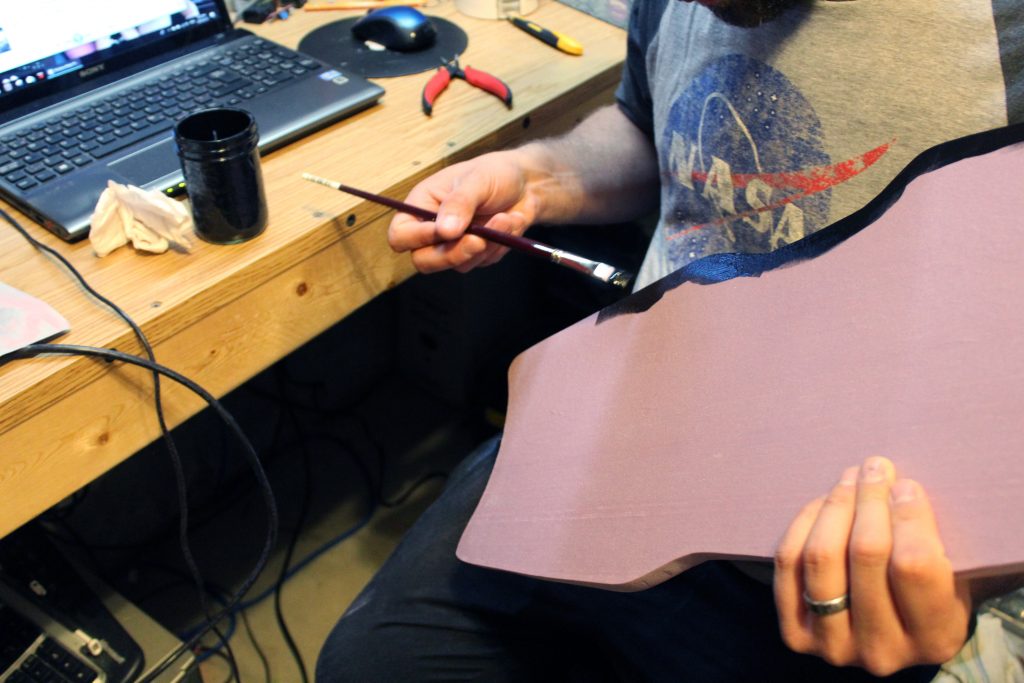
Once the board was assembled we picked up and spray painted some disposable plastic plates for the silver circles on the bottom. The rest of the pieces were 3D printed using Imirnman’s models from
Noteworthy hoverboard resources
Now that I’ve shared how we created our hoverboards, I wanted to mention a few other makers with great tutorials in case one of those is more your style.
I came across some beautifully crafted hoverboards for purchase online – solid wood, and as close to the originals as possible. They’re above my price point, but if you have some cash set away I’d recommend checking out the hoverboard replicas and kits at GoldenArmor.com.
DIY Prop Shop also has a pretty great tutorial on making a plywood hoverboard, along with graphics you can print at home (standard printer paper sized), for the classic pink Mattel model:
Also worth checking out if you have access to a 3D printer, Imirnman created all the parts for the pink Mattel hoverboard and posted them for download on Thingiverse. There’s also an option to order them printed, which is ideal if you don’t have a 3D printing champion on your team yet.
17 replies on “Making hoverboards, Back To The Future style”
Hi Martha,
your Spike costume is breathtaking. So detailed – respect!
I guess I would be too lazy to be so accurate. 😀
The hoverboard graphics also look stunning!
I wanted to ask if it would be possible to get them in a higher resolution and less compressed? (Maybe via E-Mail?)
The ones posted here are quite small and sadly have some JPEG compression artefacts.
It would be great if that would be possible.
But I guess I´ll first try to make your skyway sign for my BTTF vitrine.
Thank you very much in advance!
Kind regards from Munich
Alex
Hi Alex,
Thanks for the kind note about my Spike costume! It was a ton of work so I totally understand not wanting to put that much time in to make it accurate. But it was a ton of fun and I’m so glad I did it. I’ll have those photos and memories forever.
You’re right, thanks for letting me know that the images linked from this post were small and low resolution. I’ve taken a minute to update the hoverboard gallery on this page with links to higher-res versions. If this isn’t high enough quality for what you were thinking, let me know and I can email them over to you as well.
I’d love to see pics of your BTTF vitrine when it’s done – what a great idea!
Martha
hi Martha,
congratulations for the job. I noticed that in the image with the letter D you wrote 3d printed parts from thingiverse.
I tried to search but those pieces don’t exist. there is only Marty’s hoverboard. where could I find those kind of handles?
thanks and congratulations again
Hi Simone – I used the bottom parts from Marty’s hoverboard (https://www.thingiverse.com/thing:1750752) for the other hoverboards as the bottoms are similar on all of them. The graphics and cutout shapes I used for each hoverboard are linked in the post. Hope this helps!
Hello again Simone. I just remembered that Marty’s hoverboard doesn’t have the side grips, and that my husband designed them and put them on his Thingiverse page for free download. Here’s a link right to it: https://www.thingiverse.com/thing:4035907 and here’s the link to the circle stomp pad on the top of the board: https://www.thingiverse.com/thing:4034081
hi martha, i was just wondering is there a way that you can print the sheets of the pink hover bored graphics into parts and not all as one? i have small printer and not alot of printer shops in my small little town, so if there is a way to print it into sheets of a full size hover bored that with be very nice.
Hi Kanna! I didn’t have a good print shop in my town either, so I just ordered it online from Vistaprint and they mailed it to my door. If you’d rather print at home, DIY Prop Shop made a nice PDF that prints on regular sized paper that you tape together. It used to be linked from their hoverboard video but the link is broken, so I posted on my site: https://boulianne.net/maker/wp-content/uploads/2021/03/DIYPS_hoverboard_printouts.pdf
Happy making!
Hello are you still make this boards ? I was Jason Scott Lee stunt double for all of the hoverboards I would like to get the red and white one .
Hello Richie – what a cool memory, being a stunt double for Scott Lee in Back to the Future 2! I can see how that’s worth buying some memorabilia to remember it by. Unfortunately I’ve never sold hoverboards – I just designed the decals and made a few for personal use. Golden Armor has some really nice kits for hover boards that you can order and assemble – the rising sun hoverboard kit is available at http://goldenarmor.com/risingsun/2013/2/18/rising-sun-hoverboard.html
Hello,
Do you have the hoverboard graphics in vector? Or in high resolution? We would like to directly print the graphic on a plate with our UV printer
Thank you
Hi Nathan! Yes, I’ve provided the hoverboard graphics in high resolution in this blog post. If you click on the image of one of the 6 hoverboard graphics under the “Download the hoverboard graphics” title, you’ll get a link to the high-res versions of each. Do let me know how your project goes!
This is really great! Amazing attention to detail.
I was wondering if you might be willing and able to provide the graphics upload in a PNG rather than JPG? It would preserve the image quality and colors much better, and probably a smaller filesize too.
Thank you, Craig! I did upload a very large file size/high quality JPG image, which is linked to from the small thumbnails in the blog. Feel free to use those for your project 🙂
This is so awesome!
Would you happen to have the vector artwork available as well? I can use the outlines and assign them as cut lines for our school laser cutter. Thank you!
Thanks, Miguel! I’m so glad you like the artwork. I’ve updated this post to include the outlines so you can laser cut. Cheers!
Hi Martha, years ago my dad cut out the shape for the “Odd man out” hoverboard, but at the time I was unable to find any resources to print out the decals. You have helped turn this dream into a reality. I do have to ask, what are the dimensions for that graphic as a full scale replica? Im praying it fits my board. I have a piece of 3/4 thick birch that im using.
Hi Tim! I printed the Odd Man Out hoverboard on a 24×36 poster and cut it out, then cut out the foam base (though wood could work) based on those dimensions. Re-cutting the wood might be the easiest way to go, though you could also scale the graphics to fit by adjusting the size in your print dialog. The graphics, at the size I printed them, turned out to be 9 15/16 inches x 29 5/16 inches. Hope this helps!